Hello, Felt-sters!
I have for you today a quick technique tutorial. I received this tool a few months ago at CHA from the lovely people at Clover. It works pretty much like the other tool I use, but able to pinpoint (ahem) a tinier area. I think it works great for a technique I’m calling a felted seam. Catchy, I know.
This technique is for use over the seaming of a felted wool scarf, pillow, blanket, or any other project that you might be doing a lot of piecing and/or scrap-using-up. My example just shows the technique and you can apply to a project of your own.
Materials:
Felted Sweater scraps (or a project you are working on)
Sewing Machine and thread
Roving
Needle felting mat and tool

1) I have some felted wool sweater scraps, a Clover brush, and the new pen-style tool.
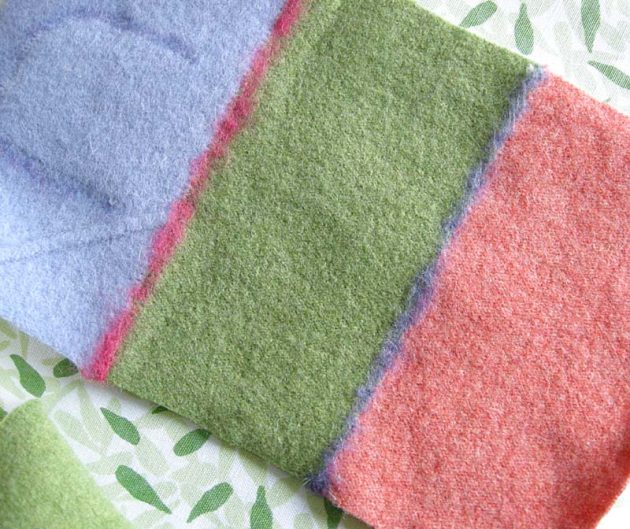
2) I cut some equal-width rectangles and butt the edges together while using a wide zigzag (and about a #2-3 stitch length).
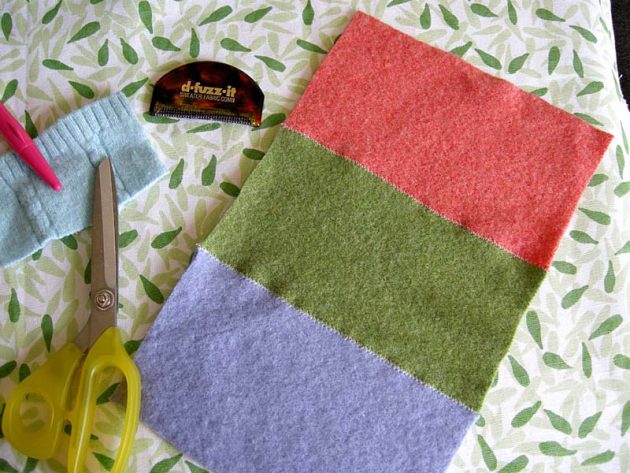
3) Since I am going to hide the thread, I didn’t bother matching the felt and just used white. Steam press from the wrong side to smooth woopiness. Also note my de-fuzzer tool, very helpful on pilly sweater felt.
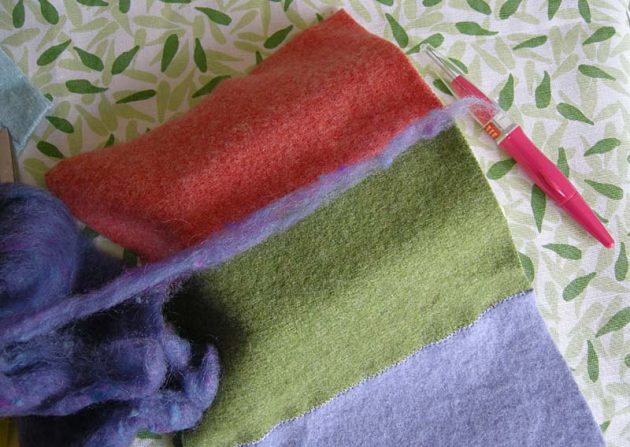
4) Lay seam, right side up, onto felting mat. Place a narrow piece of roving across the seam and needle felt along the seam, covering the zigzag stitches.
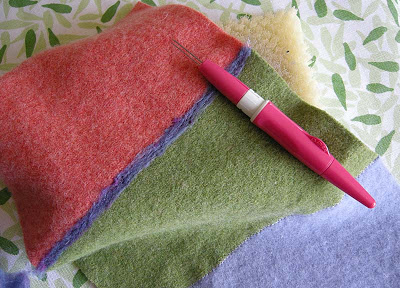
5) Steam iron on the wrong side to “set” fibers. Repeat for the other seam.

6) You can even do this around appliques or seamed on pockets. I cut a little pocket shape out of a scrap with a ribbed edge. Zigzag to attach. Crooked seams? No worries! Steam it and needle felt right over it.
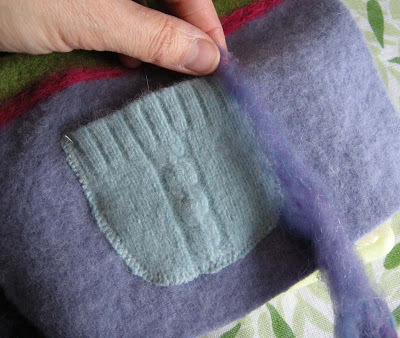
7) Cover stitch line with roving and needle felt around pocket.

8) Kinda groovy, huh?
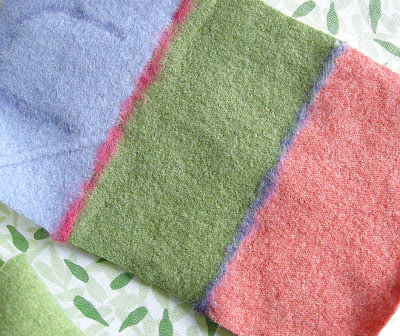
9) Here’s the back view see? Stitches hidden there, too. This would be great for something two sided, like a scarf.
I just love the possibilities for this technique. I used contrasting colors to make it easy to see, but you could do some nice blending or put it on curved seams, etc. BTW, I have seen a lot of felted wool scraps for sale these days on etsy (type in “felted wool scraps” in the etsy search window under the “description” category) and if you’re in need of roving, I like Ornamentea.
Give this technique a whirl! I bet it could be used to make some fun variations on the projects in Warm Fuzzies…let me know if you try it!

That looks so good! I just got that Clover brush but I haven’t tried it yet. Glad to see that it works so well.
This is so cool…my only problem, I live in Arizona. You know, 110 degree weather 9 .5 months out of the year…Can’t find a sweater to save my life! UGH!! I want to learn to felt SOOOOOOOOOOOO bad! 🙁
Erin,
Sounds like you’re a candidate for the wool scraps for sale on etsy!
Betz
what a fab idea. you know, i was flicking through warm fuzzies the other day and looking at the cushion cover made from scraps, and wondering if there might be a way of hiding the stitched seems. will have to give this a try!
Looks like great fun – thanks for the inspiration!
Than you for sharing that tuto, it’s great! I have not seen before that tool, I have the other one and I tried some projects!
Saludos
Hi Betz! that’s me another time…If you want to see what I had made with this technic:
http://filblau.blogspot.com/2007/02/detall.html
Have a great weekend!
Terrific idea! When I first read the name felted seam, I thought whoops! typo, should be felled seam. But no, you’re onto something really useful for all of us out here using up all those felted scraps. Thanks for showing all the steps too. Also, love the colors you’ve used in this demo/project.
I took a quilting class last Wednesday and the one thing that my instructor emphasized over and over was that if you bought your tools from Clover, you’d never go wrong. LOL
~Kim Funk
[email protected]
(one day I will figure out why I can’t leave comments on blogger)
I love this seaming technique! Too good.
Thanks for sharing my dot tutorial:)
susan
Great idea and tutorial! I love that you call it “woopiness”! My word for it is “wonky” 😉
What a clever idea! and so effective. Can’t wait to have a go myself!
that was a great lesson…my favourite part and made my day was “woopiness”!
Betz, what would happen if you washed something with a felted seam? I know: I should just try it myself, but I thought you might have already experimented with this…
thanks!
Lisa K,
If the needle felting is really secure, it should be fine for handwashing.
Betz
How do you keep the seams from stretching and waving while sewing them?
Anon,
Don’t pull the fabric when sewing, just butt the pc’s together and let the machine feed them through as you stitch. They will be a little wavy but then steam press and it will lie flat.
Betz
Actually, I have found lots and lots of wool sweaters in thrift stores. It doesn’t take long before people moving here from colder climes to realize they don’t need them anymore!
Love it! I felted my Dad’s wool sweaters after he died. I have already cut them in squares & hand basted the squares together. I wanted to do “felted seams” and wasn’t sure it was possible till I read your post. Thanks for sharing!!!
Clever! Thanks. I like to make bags and stuff from boiled wool. such a pretty way of beautifying seams!
Wow — what a great idea. Thank you for sharing this lovely technique!