(This is the kind of photo your 10 year old takes when you ask him to please turn off the TV and come outside to take a photo of his mother, it’ll only take 5 minutes. Thank you, Honey.)
 I told you I had another canvas tote transformation coming, and this is it! I’m calling it a Gardening Apron, but it can be used for pretty much anything. I’m thinking I’ll use it most for when I have a booth at craft shows to keep a calculator, pen, pad, etc. at hand. Like the last apron, this is repurposed from one canvas tote. I added a frayed-edge appliqué to spiff it up a bit!
 Start with a canvas tote that is about as wide as you want your apron. Go on, just hold it up to your waist and eyeball it. Mine was about 17″ wide. One side of the tote will be the apron front. The other side of the tote will be used to create the pocket. If your tote has an ugly logo on it, the pocket will most likely cover it up! You’ll also need a heavy duty needle for your sewing machine.
 Use a seam ripper to take off both handles and set them aside for later.
 Cut down the side seams and open up the bottom gussets.
 Use the top hem of the tote as the top of your apron and pocket. Decide how long you want your apron (mine is 12″) and how long you want the pocket (mine is about 7.5″). Cut rectangles accordingly.
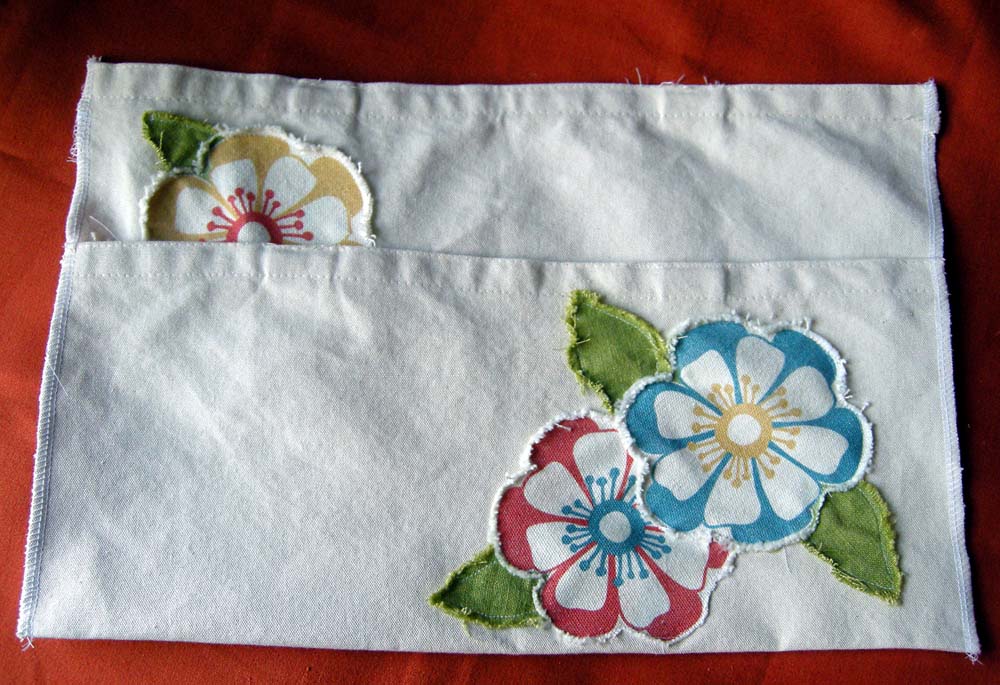
 Now is the time to add appliqués, before apron assembly! I cut out 2 large flowers from my Picnic Floral print in organic canvas. I also had some scraps of green linen I cut out for leaves. Leave 1/8″ – 1/4″ border of extra fabric around your motifs when cutting out. Once I decided on the placement, I pinned the motifs onto the pocket rectangle and the main apron rectangle. Make sure you leave at least a 1/2″ of space at the bottom and side edge of the pocket to allow for seaming later.
 Next, top stitch around the shapes. Stitch the bottom shapes first by lifting the overlapping ones out of the way as you go. To fray the edges, you’ll need a squirt bottle and some kind of stiff brush. I used a fingernail brush, but a suede brush or old toothbrush would work also.
 Spray the appliqués with water, then gently brush the edges to fray. When I’m done, I like to throw it in the dryer for a few minutes then trim off the really long scraggly bits.
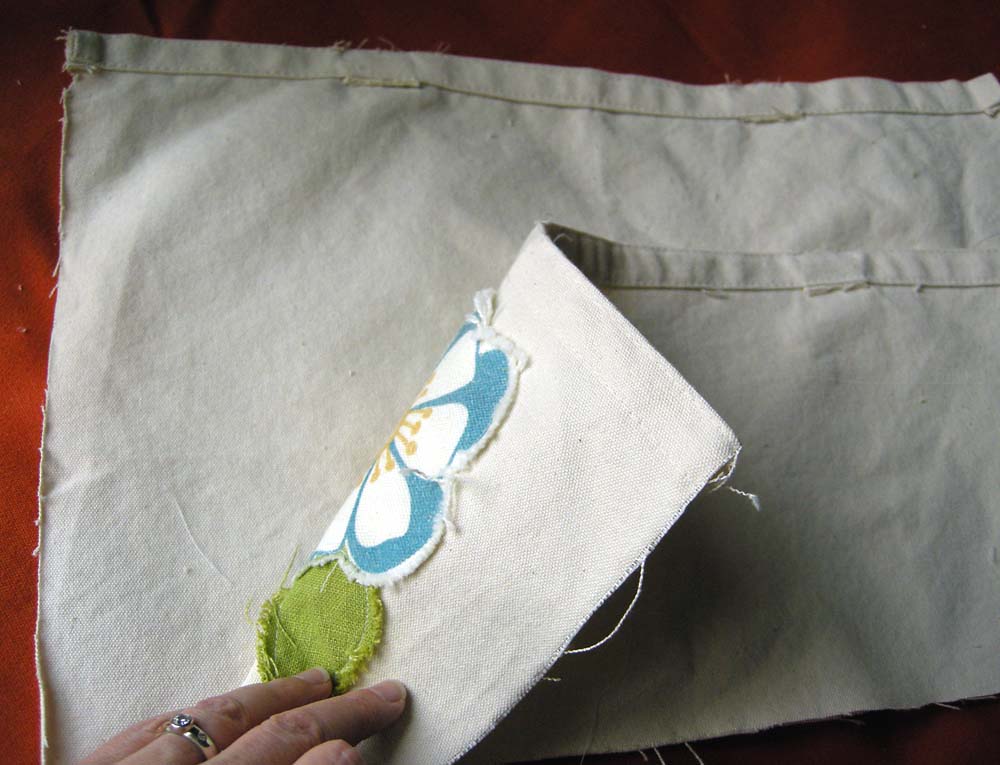 Next, place the pocket rectangle, right-side-down, on top of the wrong side of the main apron rectangle. Pin the lower raw edges and sew across.
 Fold the along the seam, bringing the pocket to the front and press. Zigzag stitch or serge the side edges together. Next, fold the side edges to the back (1/4″) press and pin. Top stitch the edges, slowly and carefully as layers of canvas can be thick to sew through.
 Take one of the tote handles you set aside earlier to create an apron strap. Cut one end at an angle, zigzag/serge the end. Cut the other end straight, zigzag/serge, then pin to the back of the top edge/side of the apron. Stitch (slowly and carefully!) in a square around the end of the strap. Repeat with the other handle to create a strap for the other side of the apron.
 Now you’re done! Tie it on and stand with authority with your back to the garden that mocks you with it’s overgrown zucchini plants (with teeny weeny ‘inis), and prolific bok choy that you don’t know what to do with. (Just kidding. I love our crazy little garden. It’s coming along nicely and I’m happy to eat whatever comes out of it.)
Hope you use this tutorial, share pics if you do! Don’t forget BBQ Dad and Little Leonardo with my Utility Apron Tutorial and my Little Artist Apron Tutorial from last week.
So cute! I like to wear aprons at home and at shows too, it helps me keep all of the things I need at hand. This was a great tutorial, thanks for sharing! Theresa
Very Cute! I like the photo that your son took to.
What a fun little apron. I might do this from a smaller bag for my little ones! I feel a get-started-on-summer project taking shape.
very clever idea !
That’s freakin’ adorable! 😀
That’s great! Gracefully
OK, that is totally cute!
Wow…….I love the apron. What a great idea. Susan
Gorgeous apron , love the way you frayed the edges.
I really love this idea!
A great idea – and I love the how-to create the frayed edges! A real A-HA moment. May I post the image of the fraying and a link to this tutorial on my blog?
Many thanks,
Michelle
Betz, thank you so much for taking time out of your day to create such a great tutorial– I know we all really appreciate it!
I never knew how to get the “chic” frayed-edge look so I’m really excited about learning that! It looks like your gardens are doing great, too! May your bounty be plentiful!
Love this apron!! Love the added texture of the frayed edges from the flowers!! So sweet:)
I love everything about it! The frayed flowers are just the best!
This is fantastic and I love the frayed flowers!! Thanks for sharing.
I Like This!! Thanks for the how-to on the frayed flowers…S0 CUTE!
What a great way to recycle the free tote bags you get. Great idea!!
This is fabulous!
Darling apron and perfect for the yard – and how cleaver of you to do with a tote bag, I think I have one of those I picked up somewhere – hmmmmm…. You’ve got me thinking.
V
I LOVE your little apron and I you’ve made your Picnic Floral print a must have for me! Enabler. 🙂
Great tip for making the frayed edge. I usually do it with my fingers and have to wait for a few washings to make it look so rough and nice- your way is far better. Thanks!
Brilliant and beautiful repurposing!! I adore this project.
Hope you’re having a great summer, the camping trip looked too fun!