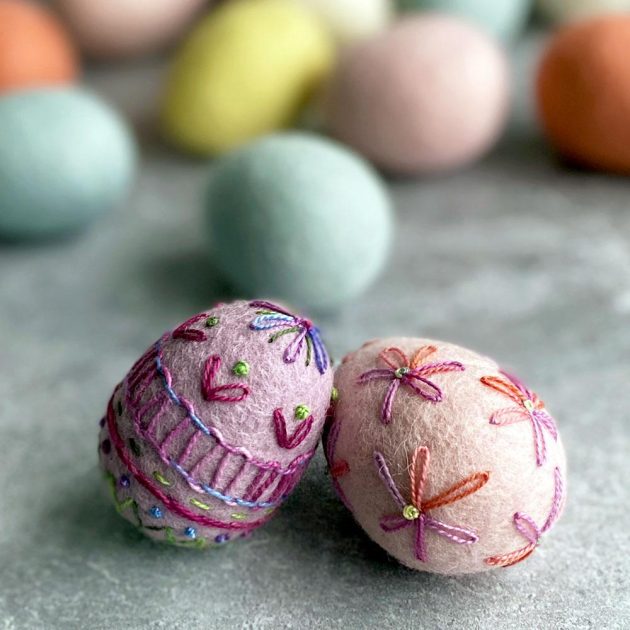
Here’s a new project for you that I’ve been wanting to do for such a long time! I’m decorating wool eggs with embroidery and it’s super fun. I’m loving how they look!
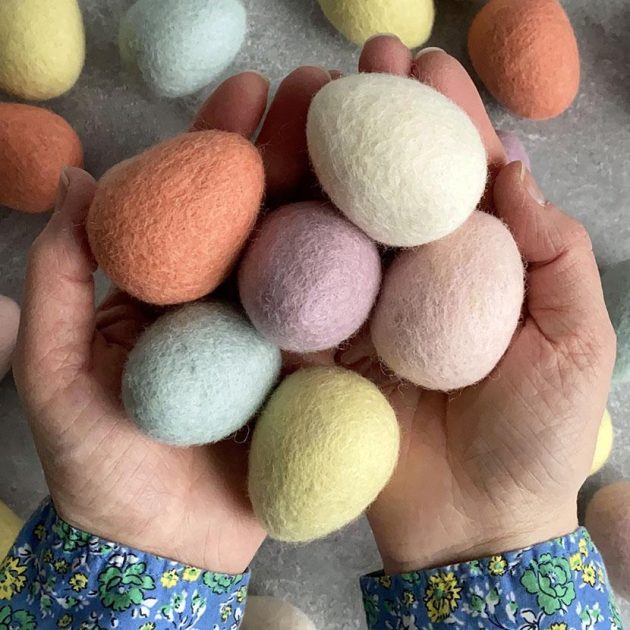
I’ve recently added these amazing handmade 100% wool roving eggs to my shop. They’re about the size of an average chicken egg and the colors are so pretty.
Each egg is densely felted wool and perfect for adding embroidery, needle felting or appliqué. Just looking at them is giving me a ton of ideas! How cute would these be in an Easter basket or hanging from an egg tree?!
Here’s a few tips to get you started if you’d like to try your hand at embroidering wool eggs.
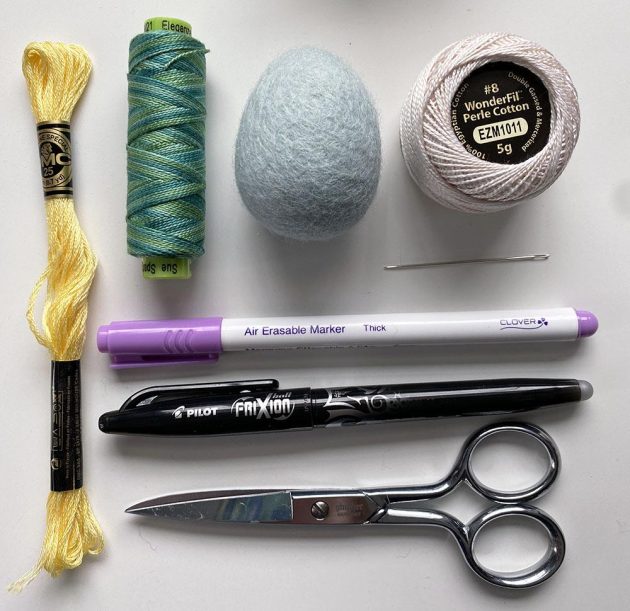
You need wool eggs, embroidery floss, a needle, a disappearing ink pen and scissors.
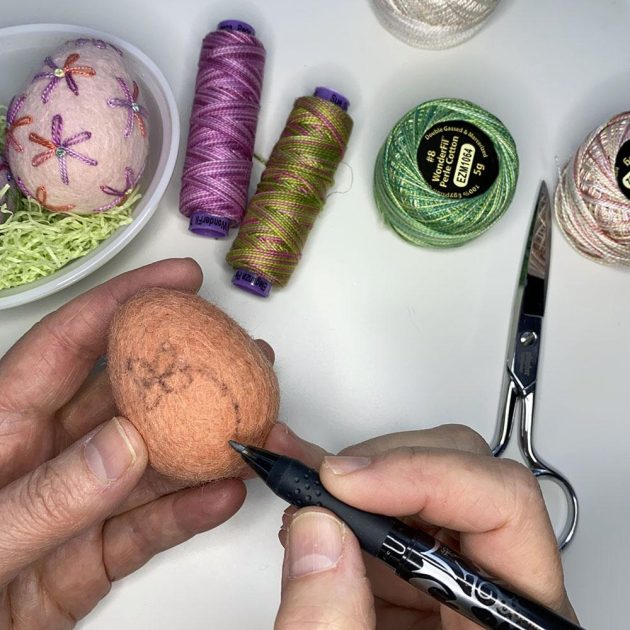
Start by marking a design on your egg with a disappearing ink pen. I used a Frixion pen in black. The ink will disappear when heat is applied. For this design, I’m going to make some little flowers and vines.

Instead of knotting the end of my floss, I left it unknotted. I started by inserting the needle at the bottom of my egg, about an inch or so from my first marked line. I pulled the needle through then left about an inch tail of floss sticking out at the bottom.
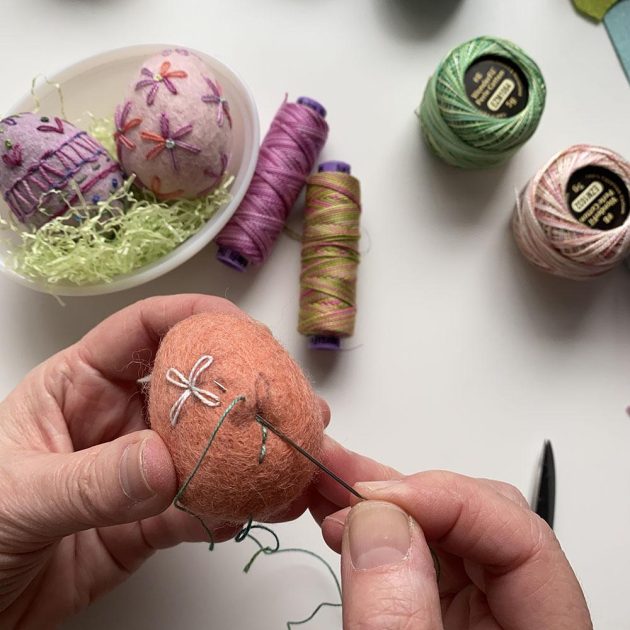
Then I started to embroider my vine with a backstitch.
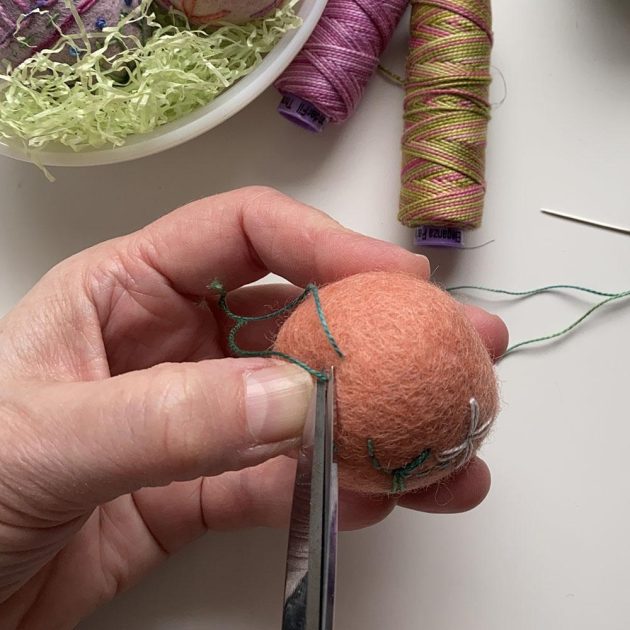
When I was done embroidering, I brought my needle back down through the egg to the bottom. I slightly compressed the egg then snipped both floss ends. As long as you exit the egg at least 1-1.5″ from your last stitch, your floss will be buried inside and stay put.
Alternately, you can bring the end of the floss out under a previous stitch and hide a little anchor stitch before “exiting” if you are concerned about the embroidery being more secure.
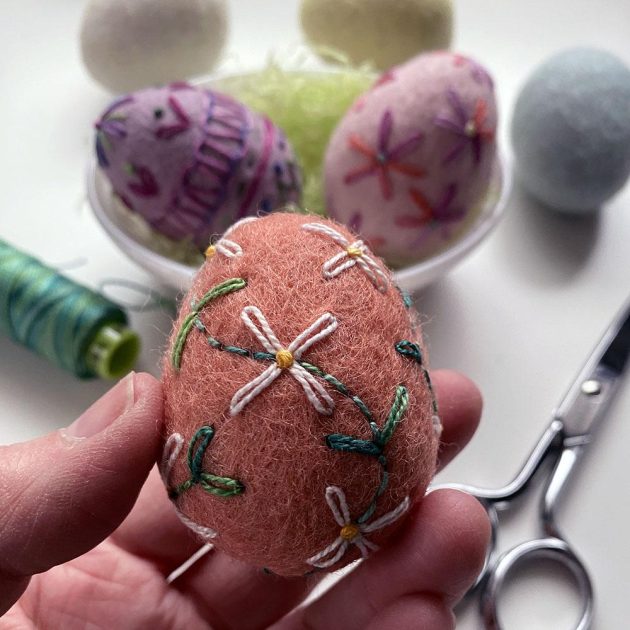
When I was done, I removed my Frixion pen markings with a little steam from my iron. Cute!
You can get your own set of 6 wool eggs, each in a different pretty pastel color in my shop! And if you need any embroidery stitch refreshers, you can find stitch videos >HERE<