Welcome!
Back in the day (10+ years ago!) I created this free tutorial for my readers and it’s become one of my top ten most popular projects!
I hope you enjoy this “Vintage Betz White” tutorial and consider becoming one of my email list subscribers! Join my email list for fresh new content, freebies, discounts, sneak peeks, and other goodies!

photo by Angela Tong
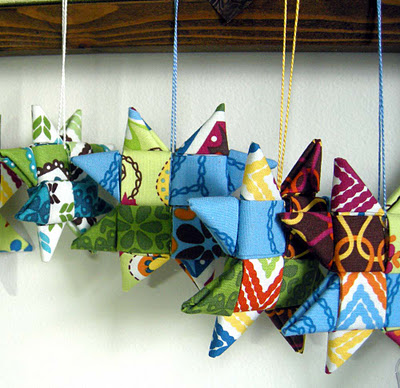
I’ve been making these adorable fabric star ornaments and wanted to share them with you! I was surfing around the internet and ran into this wonderful tutorial . Although it’s not written in English, I was able to muddle my way through it! There is no sewing involved and they go together pretty quickly once you have done the cutting and pressing. I came up with a few little tricks along the way, so I thought I’d do my own tutorial.
Start off with 4 rectangles of fabric measuring about 3″ wide by 14″ long. Press them in half lengthwise creating a center fold. Open the fold then fold the raw edges to meet at the center. Then refold the center fold and press once more. You’ll end up with 4 strips with the raw edges neatly enclosed inside.
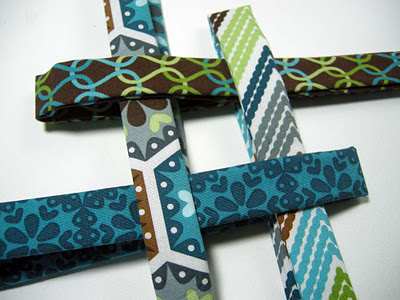
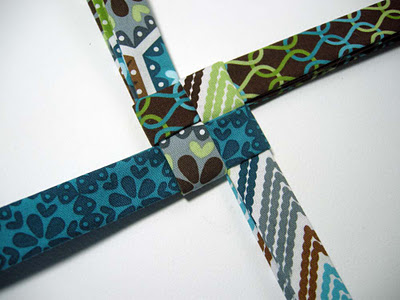
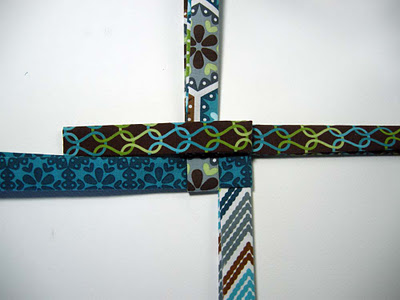
Fold each strip in half and lay them out as shown above. You’ll need to have them alternate so that each strip is both inside and outside the fold of each other. I’m not sure of a better way to say that, but they need to interlock with each other.
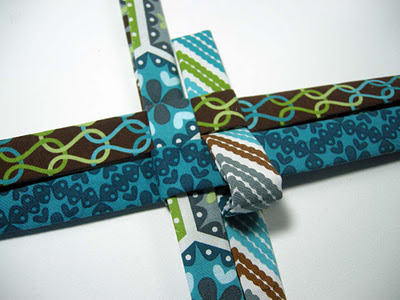
If you’ve got a bodkin (or even tweezers, I suppose would work!) you’ll want to use it for the next step.
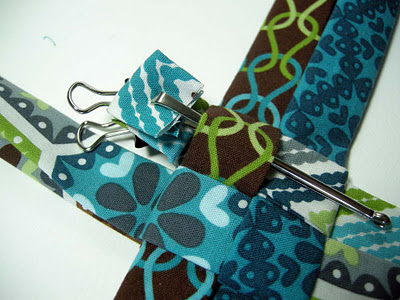
Slide the bodkin under the cross strip located below the point you just made. Clamp it onto the end of the working strip and pull it through.
The binder clip has kept the point folded neatly while the bodkin has hopefully made it easier to weave in that strip without loosening up the whole square. Continue, making all 8 points and weaving in the strip ends.
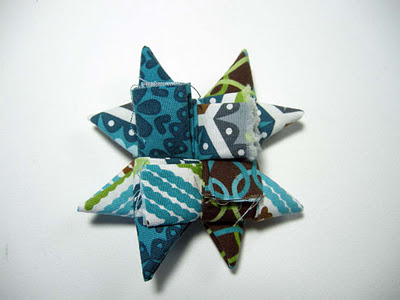
Now the main construction is done! You’ll need sharp scissors to trim off the excess strips, as close as possible to the edge of the cross strip that they were woven under. I think it helps to slightly bend the ornament in half to get my scissors in really close!
The last step is to make the hanger loop. Thread a heavy needle with some embroidery floss and make a few stitches through the top between a set of points. (the smaller version, upper left, was made with 2″ strips. Cute! I opted to mostly make the larger size. They were easier to work with and showed off more of my Stitch Organic fabric !) I searched the internet to see what exactly these stars are called. It seems that they are sort of a 2-D or flat version of the Froebel Star or Morvarian Star. I also found this video for a Folded Paper German Star you may find helpful. Watch the Part 1 video , which shows basically what I’ve done to make the fabric stars you see here. If any of my photos/instructions are confusing, watch that video and it’ll all make sense! I’ve had such a great time making these! I think they’ll make great teacher/neighbor/hostess gifts!
Did you enjoy this “Vintage Betz White” tutorial? Join my email list for fresh new content, freebies, discounts, sneak peeks, and other goodies!

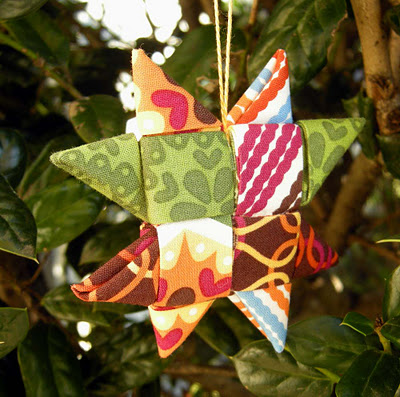
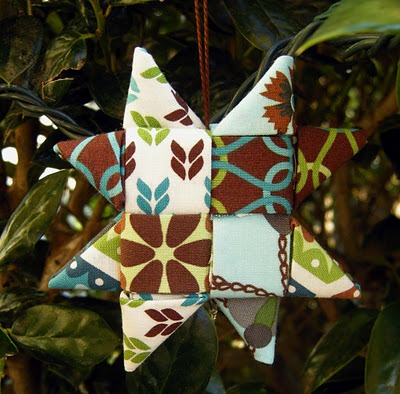




Oh love these…and I’m thinking I will be making quite a few of them tonight (that is if I can truly figure them out). 🙂 I tend to be origami challenged.
Oh Betz it worked! It took a couple of tries (maybe I should watch that video) but I made one –I will try to make more for Christmas gifts. Thanks for the tutorial!
I learned to make something very similar out of paper strips as a child. The version I learned is 3D with curled points that come out of the center as well. I’ve never seen them done in fabric, beautiful!
What a great idea … and your instructions make it look easy. I shall attempt one today – wish me luck! Thanks for sharing.
Thanks for sharing! I’ll have to try these soon!
Thanks so much for sharing. I may not get to these for this Christmas, but will work on them for next. They would look cute hanging all year also, depending on your choice of fabrics.
This looks like fun, tried the Folded Paper German Star link and couldn’t get it to open. Has anyone else been able to open it? Thanks.
Hi Thimble,
I fixed the link to the video, thanks!
So, so beautiful! Love the colors and the patterns of your stars! Thank you for linking to my tutorial! 🙂
Kindly, Lorraine
Hello from France! We made 4 of these yesterday with my daugther and they are gorgeous.
You can see them on my blog:
http://www.bouillondidees.blogspot.com
Thanks for sharing!
Hi Betz – I’m a little bit confused. Seems the second (longer) set of strips, the 4 that you would fold under to the left to make the point, don’t have a loop directly below them. Do you do the 4 points on the Right of each square side, then trim the excess, then do the 4 on the left of each square side and pull it through the loop at the bottom?
Thanks!
Hi EG,
After you make the points on the right, flip the ornament over. The strips that were on the left will now be on the right (with a loop below them) and you can make those points. If you watch the video I think you’ll see what I mean.
Thanks,
Betz
Watched the video and figured it out. For some reason I had to switch the way all the strips were facing after I flipped it to make it work, but it did work! Thanks for the tutorial!
Merry Christmas! Thanks for the tute for the stars. Maybe I can get them done for next year!!!
Merry Christmas !!!
Greetings from TURKEY 🙂
visit http://pandoraarte.blogspot.com
Lovely. I have made many of these with flax (wonderful for Matariki celebrations here in New Zealand) but never thought of doing them with fabric.
Can also be made with paper.
Instructions can be found in this book.
Fun with Flax – 50 Projects for Beginners
http://www.fishpond.co.nz/Books/Fun-with-Flax-Mick-Pendergrast/9780143009931
Love your blog!
Thanks
These are so pretty. I might have to try this in July for a banner (with red, white, and blue fabric of course). 😀
Betz….I love the fabric stars. I like them so much, I featured them on my blog, By George Youve Got It. Thanks for sharing your ideas. I’ll be back often.
Thank you very much, this ist a great tutorial, so nice of you to share.
Liebe Grüße
Bente – Germany
If you want to make the folded paper type, Froebel Stars, I recommend this video: http://youtu.be/P-HMJiRg1kk
The size of the paper is a ratio about 1:30 so a strip 1″ wide would be 30″ long, or 1/2″ x 15″. It’s a lot of fun, after the first couple.
These bring back memories for me. My maths teacher at school taught us how to make these from punched computer tape over 40 years ago. I had never thought to make them from fabric but sahll certainly give them a go. Thanks for posting this!
I loved trying to make these. I found that jelly rolls are easy to use in making these. Just cut the size and fold the outside pieces quite so far in.
I linked to your blog.
Thanks for sharing!
It turns out that this also works well with satin ribbon. You can go ahead and do the compile froebel star in ribbon but you need to starch it a little and gray check the cut ends.
I was looking for something different to make for our quilt guilds tree that we are donating for the Fesitval of Trees here in out community in November. These are perfect being that a quilt guild will be making them. Thanks for sharing!
This looks like fun. Your tutorial looks much easier than the other one I saw using ribbon.