It’s been a funny-weathered winter so far, but more often then not I have cold hands. Especially in my studio when working at the computer. One day enough was enough so I foraged through my stash of wool and cashmere scraps and pulled out a ribbed cowl neck from a cashmere sweater. Yummy! I cut it into 2 rectangles, sewed them into tubes then made thumb holes in the seams. Ta-da! Instant (practically) wrist warmers.
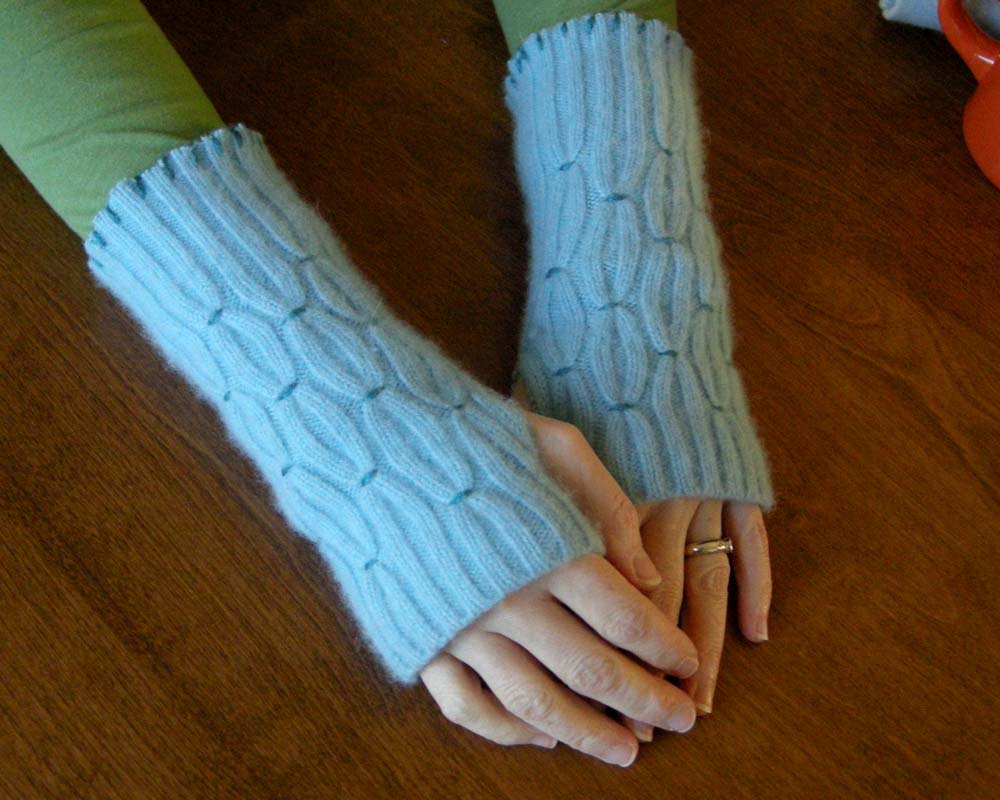
After wearing them like that for about a month, I decided that they were kinda plain and needed a little something. I remembered a fun embellishment technique that I’ve played around with before. It’s super simple to do and it can make any sweater or rib knit accessory look like it has cables or even smocking. All you need is a knit garment with some ribbing, yarn, pins, ruler and a tapestry needle.

I’ll show you a quick little how-to with a scrap of ribbing. For this example, I am going to tuck two “ribs” at a time. I’ve marked them with pins, about 1 1/4″ apart vertically.
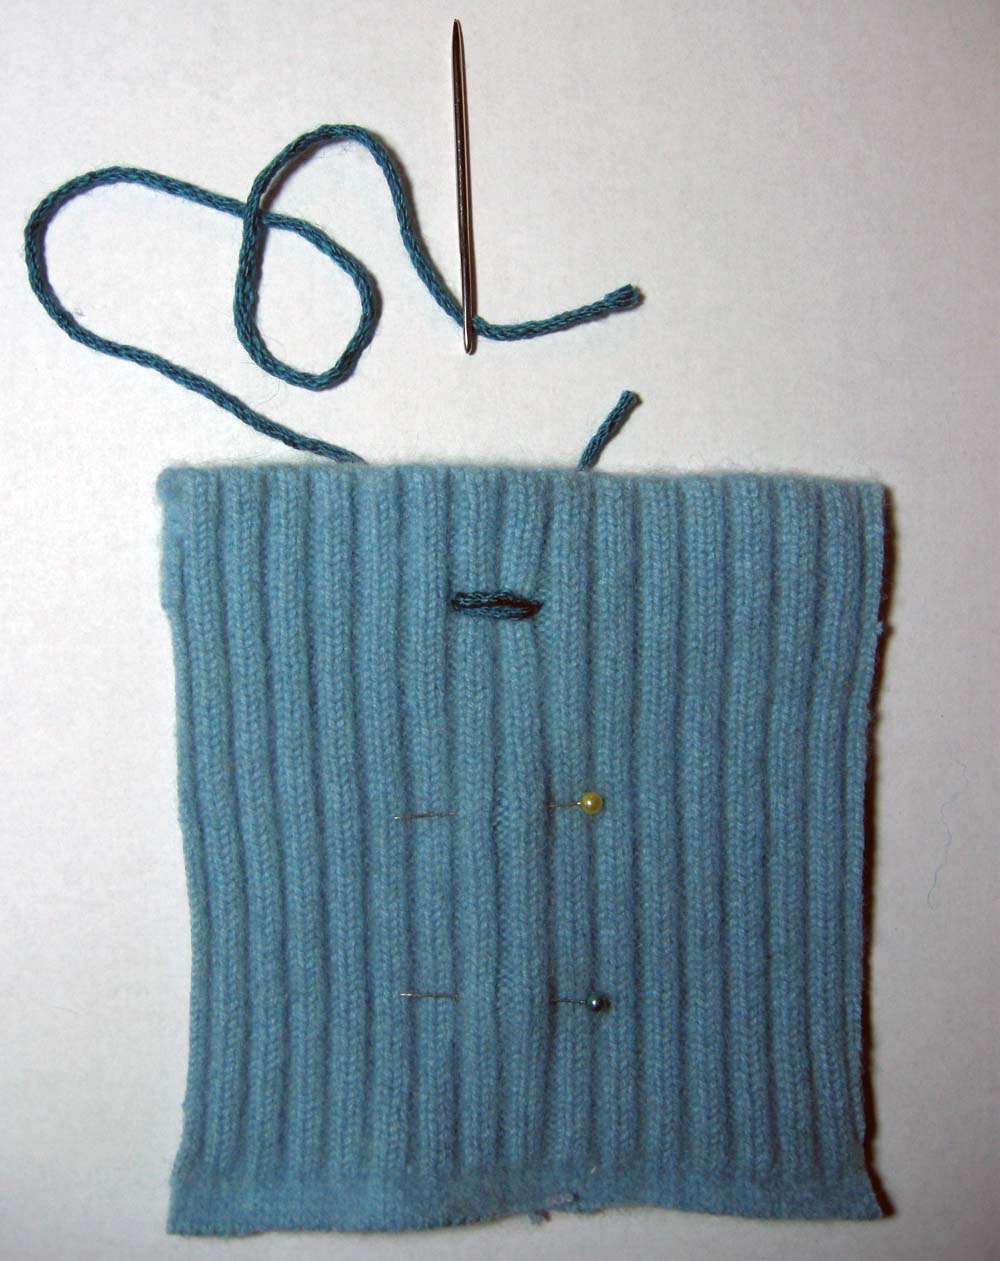
Next I threaded a tapestry needle with yarn and took two stitches, one on top of the other, around the ribs marked with the top pin.

This is what it looks like from the back. Pull the yarn tightly and tie the yarn ends together, knotting twice. Cut the yarn and do the same for each spot marked by the pins.
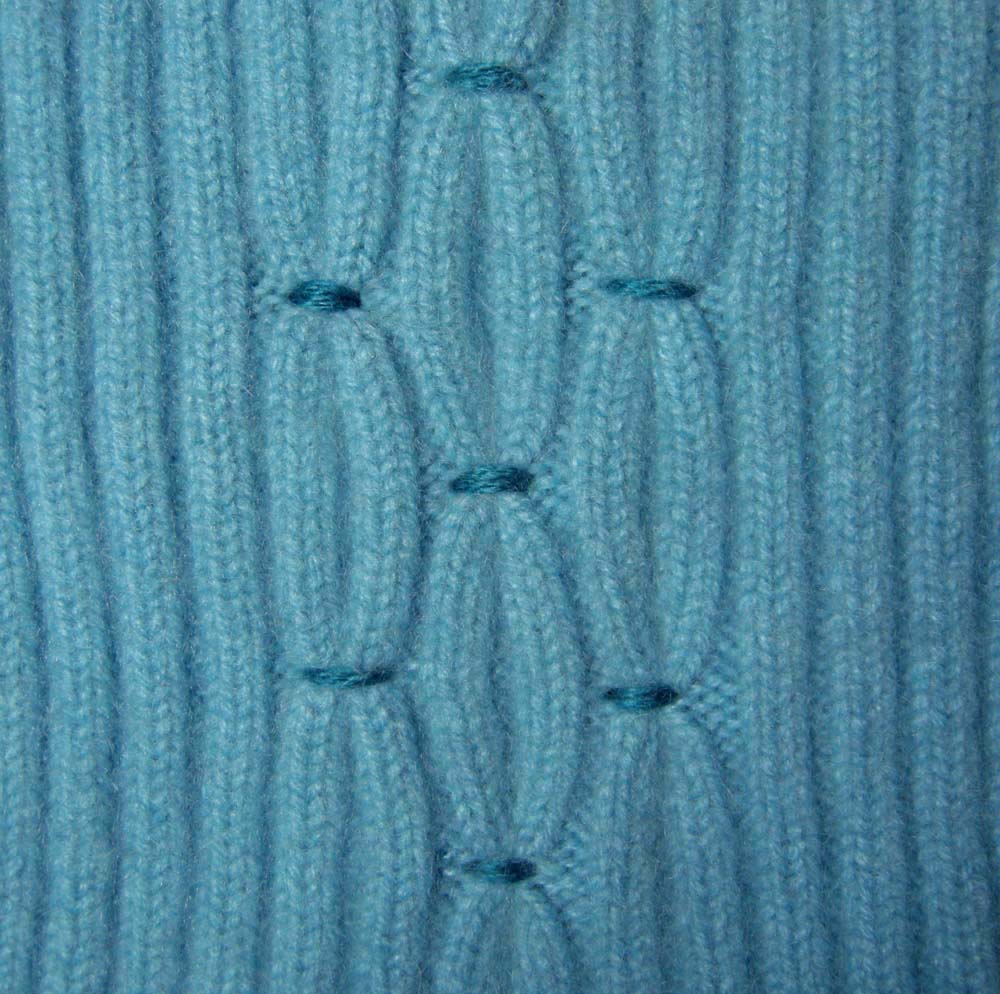
You’ll continue to make tucks, pairing up ribs on either side of the first pair, and off-setting the tucks so that they are vertically halfway in between the first tucks. That’s it! Just continue until you have made all the tucks you want, making sure to knot and cut the yarn between each tuck. If you leave them connected on the back, the floats between them will tug and distort the fabric.

Keep in mind that this technique will limit the stretch of the ribbing to a degree. I’d love to see this at the ribbed hem of a sweater or across the yoke of a ribbed cardigan.
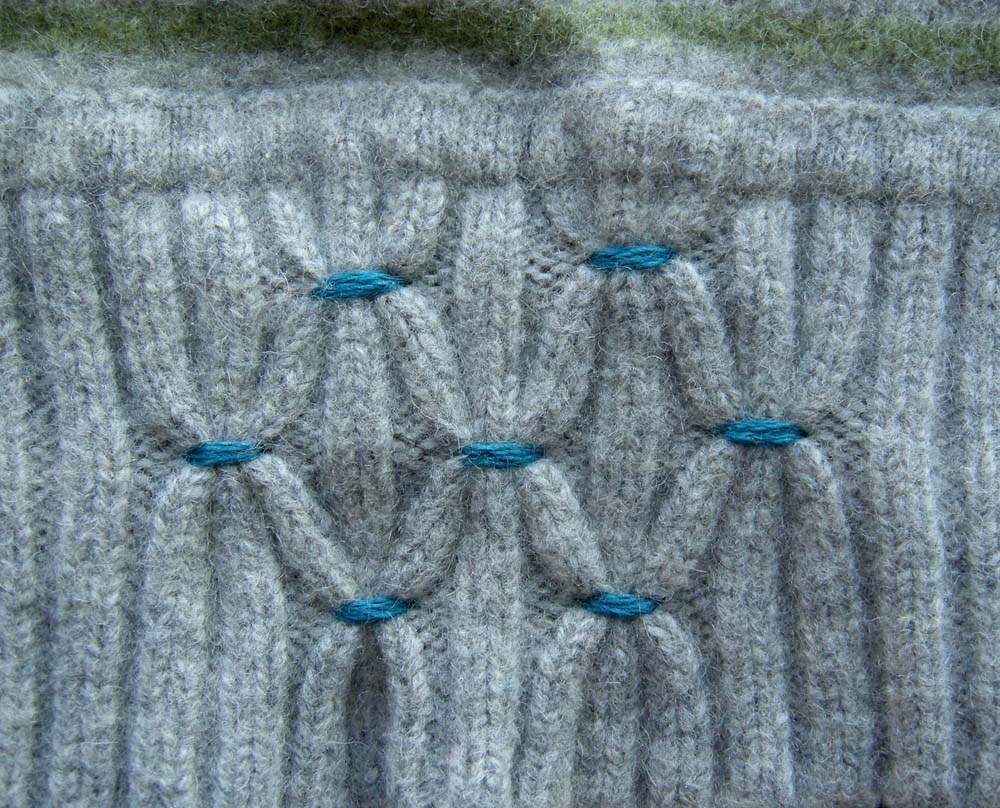
Experiment with different yarns and different combinations and numbers of rib lines. For this swatch I tucked 3 ribs together, and then in the next row “borrowed” ribs from the row above. This is really fun! Now I’m kind of obsessed with finding a fully ribbed sweater to do more of this. I’ll be sure to share whatever I come up with!
What a very fun and cool technique! Thank you! This would look great on a pillow, too, made from a recycled sweater.
Jeannine,
Yes! A pillow would be great fun!
Thanks!
Betz
that is awesome! one of those, ‘duh, why didn’t i think of that?!’ things. guess that’s why you make the big bucks 😉 thanks for sharing!
Love this! Bookmarking it – thanks for sharing.
Just popping over from twitter, I love this technique, thanks for sharing it!
What a fab technique. I will add it to my memory bank!
oh this looks like fun and so simple and unique! my problem is i never have wool or fabric scraps around…need to look through the thrift store first!
thanks for sharing!!
That is soooo cool! I wasn’t reading your words yet, and I hadn’t scanned the rest of the pics – I was just staring at that texture pattern on the knit. And wondering why I’ve never seen any knit patterns like it before! Nice!!
This technique is awesome, wow! I have never seen this before. I am amazed and will be sharing this with my sisters and friends. Thanks for sharing.
Wow what a great idea. i was thinking of making some legwarmers but didn’t know what pattern to use, I think I just found it
wow, that is really pretty! thanks for the idea.
this is great! so simple and effective, i’m amazed someone hasn’t thought it up before, but i’ve really never seen this anywhere! very innovative, you! love your blog and books!
dlw
i *love* this idea! i just made a pair of upcycled legwarmers from a ribbed sweater. it was looking sort of blah, so i will try this! thanks! 🙂 lisa
p.s. i don’t think i’ve left you a comment before, but seeing as i am now, i got your book a while ago and just love it!
Wow, I love it!!
This is FA-BU-LOUS! I love using recycled sweaters, and this totally jazzes up a regular rib. Thanks for posting this!