
Sometimes making fabric straps for a bag or other projects can be a challenge. They seem easy enough: 2 long rectangles sewn together then turned right side out. But sometimes that is difficult to do neatly and precisely. The turning and pressing can be fiddly and annoying. I’ve found that having 2 simple tools can make all of the difference: a bodkin (or safety pin) and a wooden yardstick (or paint stir).

Start with your 2 strap rectangles. I’m using pre-cut “roll-ups” of Stitch Organic, measuring 2 1/2″ wide.

Place the rectangles right sides together and sew one set of long sides together. I used a 1/4″ seam allowance.

Open it up and press the seam allowances to one side. Now you have one nicely pressed seam before the strap is assembled. Put the right sides together again and sew the second seam, as shown below.

First handy tool: a bodkin. This might be my favorite sewing tool. I think I bought this way back when Claire and I were in college together! I’m sure there are different types but this one has served me well over the years. It has little grippy teeth at the opening to grab onto the fabric. The little ring slides down to clamp them tight.

Put the bodkin inside of the strap and clamp the end of the bodkin to one side of the strap end. You could use a big safety pin instead, if you don’t have a beloved bodkin of your own.
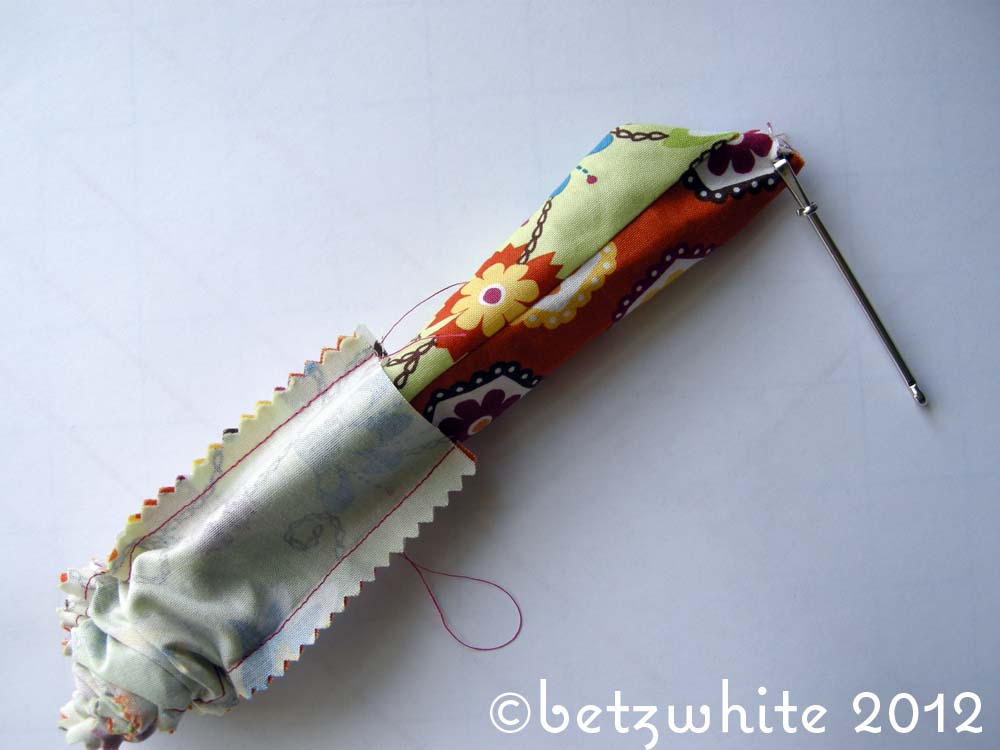
Push the bodkin or safety pin up inside the strap and pull it out the other end, turning the strap inside out. This is a little more difficult with bulky fabric or narrower strips.

Now is the strap turned right side out. This crisp seam is the one you sewed and pressed before sewing the second seam. Nice!

Here’s the second seam…not so nice! It’s really curving in and could take a lot of finger pressing and nudging to be able to press it evenly. This is where handy tool #2 comes in! I don’t have a yardstick so I will be using a (clean!) wooden paint stir.

Simply slide it inside the strap and center the unruly seam down the center of the stick. Now you can press the seam on your own mini ironing board!
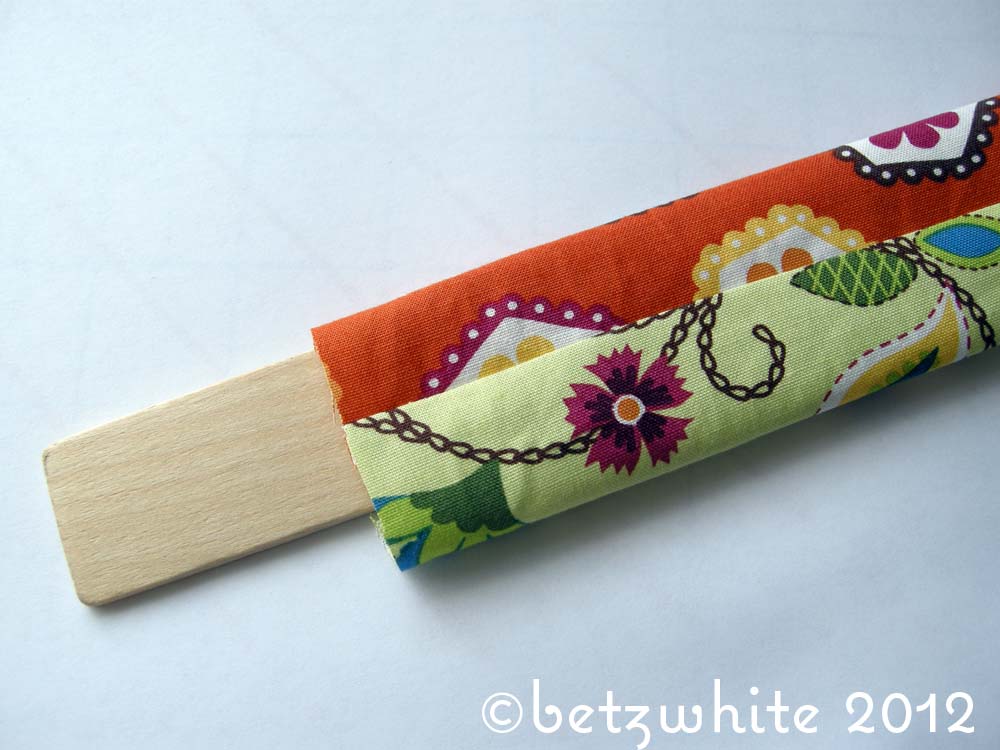
Keep pressing the seam, moving the stick down the strap as you go and out the other end.


What a great step-by-step! I love the idea of pressing over a paint stick.
However, I’ve found that I get a more crisp fold if I first press the seams open, then turn the tube and press them flat.
Happy Sewing!
Hi Sandy,
That’s a good idea. Hey, we could combine our techniques and try the paint stir trick on the second seam BEFORE turning it right side out. That way when you press that seam, the iron doesn’t make hard crease down the middle of your strap because of the stick.
Thanks!
Betz
Great tip tute! I can totally see how the wooden stick would be a perfect solution where you’re sewing 2 pieces together for a strap! Love it!
I love simple tips like this. I collect them. Then I hope I can remember them when the time comes. I remembered this tip I read on another blog I follow. Karen from Sew Many Ways is awesome at finding useful items in the hardware store and she’s always thinking outside the box! Here’s her post about turning tools for straps. http://sewmanyways.blogspot.com/2012/05/tool-time-tuesdayclamp-for-turning.html
Hi Sher,
Oooh, that tool is a good one! I might have to get one of those. I like that it’s so much longer than a regular hemostat. Thanks for sharing!
Betz
Great idea! Paint stir stick, now why didn’t I think of that! Going to lowe’s this week to get me one. Thank you so much!
Brilliant!
Thanks I really like this idea always hated doing the straps and spending so much time fingering it to get the seems even enough to press.. Thank you
Have a similar tool….large dowel, think it was originally handle for something that i sawed a flat side to and it sits flat on ironing board and you can iron the seam on it without it rolling.
Very cool trick Betz – thanks so much for sharing!