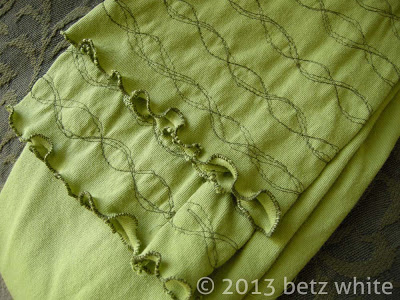
Creating a lettuce edge is super easy and satisfying. All you need is a knit fabric, a sewing machine with a zig-zag stitch and a little practice.
Last post I previewed my convertible scarf-to-shrug that has a lettuce edge hem. Now I’ll show you how to lettuce your edges and in the next post I’ll show how to construct the scarf/shrug.
I used an organic cotton jersey fabric (organic lettuce! yum!) but you can use any light weight knit. You might want to practice on an an old T-shirt. The most important thing to consider is the grain line of the fabric. To get a nice ruffly ripply edge, you’ll want your stitching to be cross-grain, meaning perpendicular with the grain, or selvage, of the fabric.
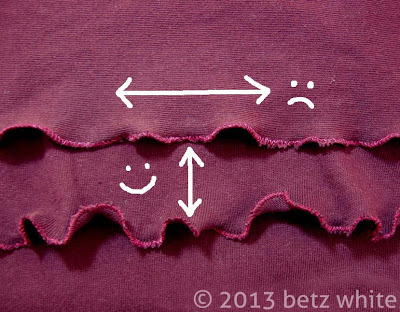
In the photo above you’ll see 2 examples of lettuce edging. The top one is stitched with the grain. Since there is very little stretch in that direction, you’ll see that the edge is a little…wilted. 🙁 The example on the bottom is stitched cross grain, with the stretch, so it is nice and wavy. 🙂
You can experiment with different fabrics. Some fabrics have 2-way stretch and in that case you can stitch in either direction.
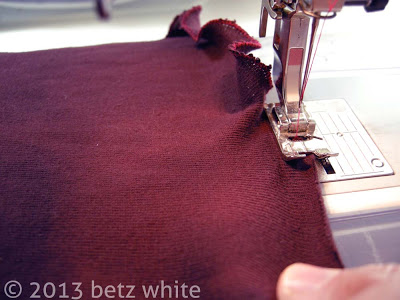
Make sure you have a full bobbin so you have plenty of thread to work with. I set my machine on a zig-zag stitch with a width of 4 and a stitch length of 1. That means a wide zig-zag side to side with stitches that are close together. Sew right on the edge of the fabric and pull gently to stretch as you sew (above). You don’t need to really pull hard on it, just guide the fabric from the back with your left while stretching it in front with your right hand. The cut edge of the jersey will probably curl a bit and that’s ok. Just keep experimenting and you’ll get the hang if it!
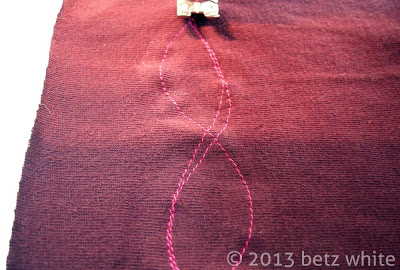
While you’re practicing, you might want to try out the scribble stitching that I also used on the scarf/shrug. Set your machine back to a straight stitch with a length of 2 to 3. Then simply stitch across the fabric in wavy lines. Don’t stretch the fabric, just guide it in long curving lines. When you get the end of the fabric, turn and stitch back the way you came, loosely following your path. Repeat this, intersecting your previous lines or create new random lines. Change the thread if you’d like to add more interest!
Next post will be the scarf/shrug construction how-to’s. In the meantime, you can practice your decorative stitching! Let us lettuce!


That’s so cool. Thanks so much for the fun tutorial. I can’t wait to try it out! 🙂 By the way, I own Warm Fuzzies and Sewing Green and they’re my favorite sewing books by far! 🙂
~Jen
Thanks, Jen! I’m so happy you enjoy my books. That’s very motivating. 🙂
i don’t sew much but i’m learning since i’ll get married
congratulations!
Sue Deere, Oops! I accidentally clicked “delete” instead of “publish” on your comment and I can’t get it back. Sorry!
This year I vowed to tackle sewing projects start to finish. Can’t wait to try this. Looking through my large stash of fabric for practice pieces right now. Well, first I have to bake bread but, I am determined to sew the first seeds of my lettuce by this weekend.
This is such a fun way to finish a knit hem when you something more polished than leaving it cut, but are way to lazy to make a regular hem. I always have trouble since knit rolls, but this is so simple I have to try it! It would make my yoga skirt comfy AND cute! Thanks