Lucky me, I was given the chance to play with a fun little machine called the Simplicity Deluxe Felting Machine. If you’ve been a long time reader of this blog (and you have a really good memory!) you may recall me playing with needle felting before. Felting needles are barbed and very sharp. The friction created by poking them into felt repeatedly makes the fibers grab onto each other and bond. Needle felting great fun for embellishing felt and other fabrics but it can be a little time consuming. That’s where the magic of this machine comes into play.

| Disclosure: The folks at Simplicity sent me the machine to try out and I’ve used affiliate links. |
It looks pretty much like a regular sewing machine without the knobs, buttons and thread guides. It operates with a foot pedal similar to a sewing machine.
The business end of the machine holds 12 felting needles and has plastic guards to prevent you from needling your fingers. There’s also a presser foot and take up lever. There are no feed dogs, so when you operate the machine, it’s free-motion. The needles go up and down and you move the work freely beneath. This baby makes needle felting go fast.
I made a bunch of little test swatchies and had all sorts of fun experimenting. Here are the results!
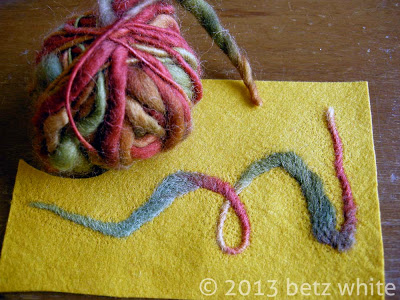
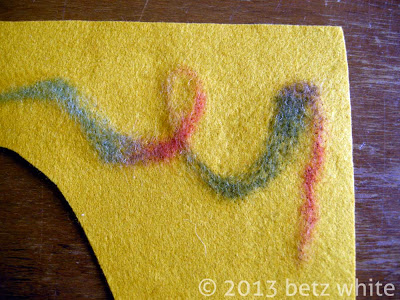
Wool blend felt as a base, thick and thin wool yarn on top. I just squiggled the yarn around then needled it down into place. This took about 1 minute! You can see some needle marks in the felt around the yarn. The photo below shows the back of the swatch. The fibers really do come through, this is totally felted in place.
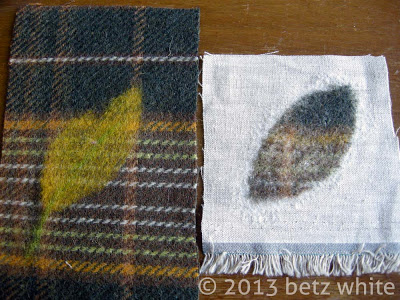
On the left is a woven wool plaid base with a wool blend felt leaf. I felted the leaf on then added a piece of yarn for the vein and stem. On the right is a woven plaid leaf felted to a piece of linen. The plaid background really hid the needle marks but the linen did not. I love how these look on the back, photo below! Of course the linen was a bad choice as you can see around the leaf it is starting to shred.
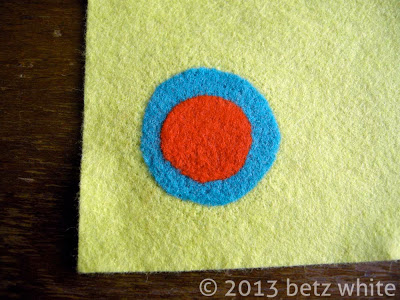
All wool blend felt, background with 2 circles layered on top. These felted so smoothly to the base that you can barely feel the dimension of the layers. Amazing! And look at the back shot below. This would be great for a scarf or something that is 2 sided.
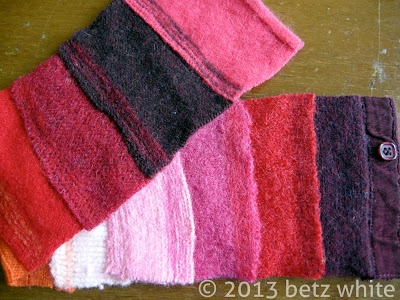
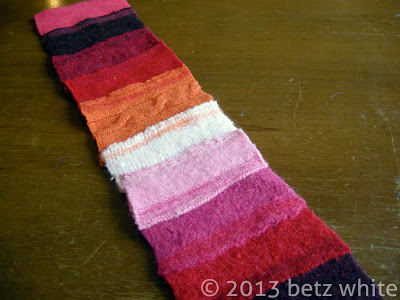
Next I dug into my felted wool sweater scraps. I just overlapped strips and felted the edges together. After each “seam”, I flipped it over and felted back over the same area from the other side. This made the color transfer front to back and back to front. How cool is that? The felting completely holds these pieces together without sewing. No thread!
I can’t wait to play more with this machine. There are a lot of books and videos out there on machine needle felting with ideas for embellishing garments and creating textile art. Many of them are beautiful yet are not my personal taste. But now that I’ve done some of my own experimenting, I can definitely see potential.
A few tips:
- When needle felting yarn or small pieces of roving, it’s a good idea to “hand tack” the piece to the background just a bit with a single needle or a Clover hand felting tool just to make sure it stays put while you’re putting it into the machine.
- Steaming your work after felting can get rid of some of the needle marks you may get in wool blend felt
- Always make test swatches
- There is such thing as too much felting! This machine gets the job done very fast. Too much needling can make holes in your fabric.




Oh my… that is super super cool. What a great toy to play with! You could decorate a cup cozy SUPER easily… just sayin’!
Okay -super excited this can felt a wool blend felt! This tool is amazing -thanks for sharing!!
yeah, it’s pretty amazing!