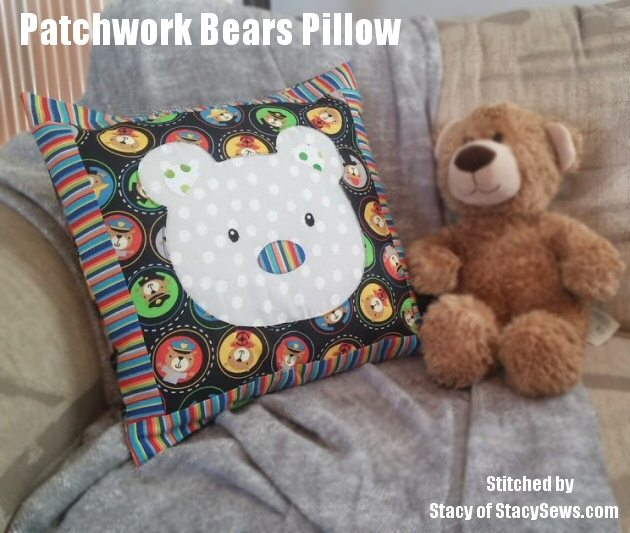
This week Stacy shares an adorable pillow tutorial inspired by my Patchwork Bear Baby Quilt from Present Perfect. – Betz
Hi, This is Stacy! One of my favorite gifts to create are those for a new mom. Not only is the present personalized for the family, but it can become a treasured heirloom for generations to come. After sewing up the Patchwork Bears baby quilt, why not transform the bear block into a coordinating decorator pillow? This is a fun way to add a coordinating piece to a baby’s room and best of all, it’s a slipcover –which means it’s easy to clean!
Finished size 14 x 14”
Materials:
12 ¼ x 12 ¼” square of muslin
12 ¼ x 12 ¼” square of fabric for the window block
10 x 10” square for the bear face
Fusible Webbing
3/8 – 1/2 yard of additional fabric for the pillow back
1/8 yard of additional fabric for a boarder print
14” pillow insert
Cutting:
From pillow back fabric:
1, 9 x 14 ½” rectangle
1, 11 x 14 ½” rectangle
From border print:
2, 2 x 11 ½” strip
2, 2 x 14 ½” strip
Sewing:
1. Follow steps 1-8 in Present Perfect for the Patchwork Bears baby quilt to create the reverse appliqué bear block.
2. With right sides together and using a ¼” seam allowance, sew 2 x 11 ½” strip to each side of bear block. Press seams open.

3. Sew 2 x 14 ½” strips to top and bottom edges of the bear block using a ¼” seam allowance. Press seams open and set block aside.

4. Take the 9” x 14 ½” rectangle – on one of the long sides fold a ½” hem to the wrong side and press. Fold this hem over again and . Sew close to the edge. This will give a finished edge to the back of your pillow slipcover. Repeat this step along the long edge for the 11” x 14 ½” rectangle.
5. Place the bear block right side up. Lay the smaller backing piece on top of the square, right sides together, making sure the raw edges are matches and the finished edge is toward the center of the block. Pin in place.

6. Lay the larger backing piece on top of the opposite side of the block, being sure to match raw edges and that the finished edge is toward the center of the block and pin in place.
NOTE: Because this section of the backing piece is larger, it will overlap slightly. This will help keep the material from gaping when the pillow form is inserted in the cover.
7. Sew around all four sides of the square. Without cutting your stitching, clip the corners and turn right side out.
8. Place pillow form inside slip cover and enjoy!

You’ll find the complete project instructions for the coordinating baby quilt in Present Perfect!

Find Stacy: Blog, Facebook, Twitter, Instagram, Pinterest
This post is part of the Betz White Sewing Collective series. Content is written by compensated contributors expressing their own views and opinions.
Nice idea Stacy! A pillow is a fun way to use a quilt block for a quicker and easier project.