Sara brings us a great bias binding tutorial this week that can be used on a variety of projects! Enjoy! – Betz

Hello friends! A few weeks ago I shared my version of the Hexie Hipster Bag. This time, I chose to make the Hot Mitt House potholder. I love the welcoming shape of the little house. It would make a lovely housewarming gift for a friend or a warm addition to your own kitchen. Plus, it is a fun way to use scraps of your favorite prints!

In the book, Present Perfect, Betz pairs the house potholder with a coordinating tea towel. With 6 messy kiddos, white tea towels don’t stay white very long in my house! My current potholders are dingy and worn out, so I took the opportunity to make a matching patchwork potholder in pretty colors to brighten up my kitchen.

I have a couple of handmade potholders from a few years ago. One of the things I noticed after using them is that the binding is somewhat melted in places. That is because the premade binding I used is part cotton and part polyester. The polyester doesn’t withstand high heat very well and can melt (just like when you use an overly hot iron). If you can find 100% cotton binding, you’ll want to use that. If not, you can make your own bias binding like I did!
You’ll need 1 fat quarter of cotton or linen fabric to make enough binding for your Hot Mitt House. It’s also really helpful to have a bias tape maker. It’s a simple tool and costs only a few dollars, but saves a ton of time. To make double-fold bias tape that measures ½” when it is finished, you’ll need a 1” bias tape maker. The measurements of the tool refer to the width of single fold bias tape.

Start by folding one corner of the fat quarter of fabric up diagonally and press.
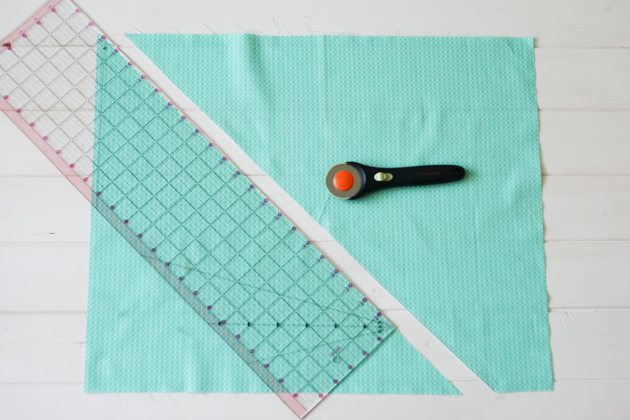
Cut along the diagonal crease using a rotary cutter and mat.
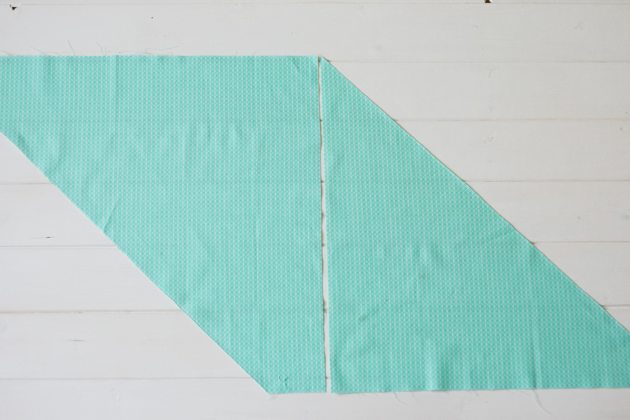
Move the left piece over to the other side and match the straight edges. You should have a parallelogram.
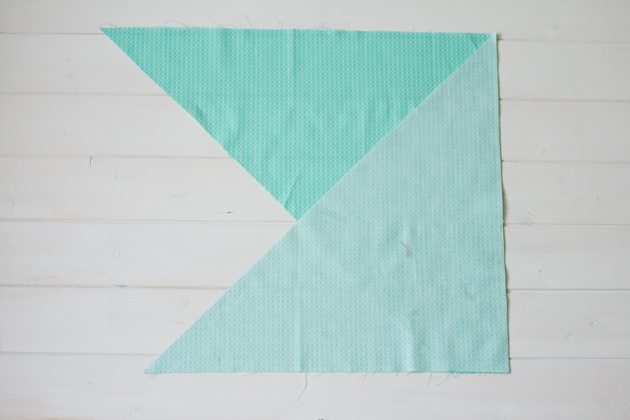
Align the straight edges right sides together, stitch and press.

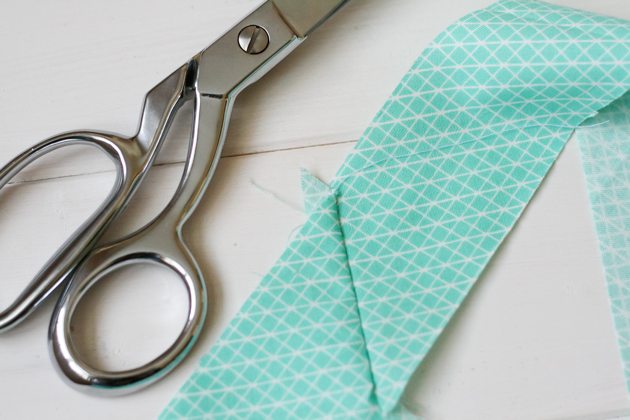
Using a rotary cutter and mat, cut 2” strips of fabric across the diagonals. The last piece will probably be too small and can be discarded.
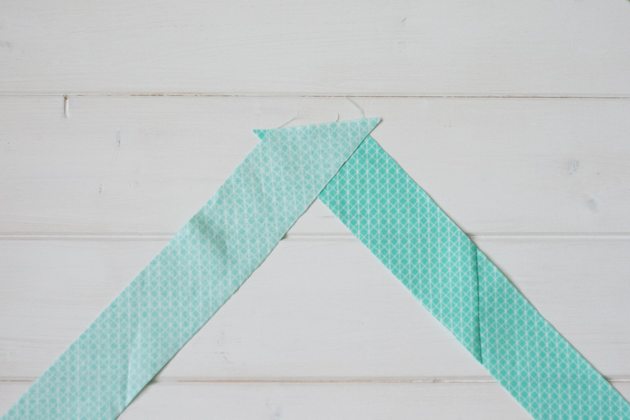
Connect the strips using a ¼” seam, matching the ends as shown. See how the corners are offset by ¼”? It’s important to align the edges this way to account for the seam allowance and to ensure that you have a nice straight edge when you open it up.
After stitching and pressing the strips together, trim the excess corner pieces.
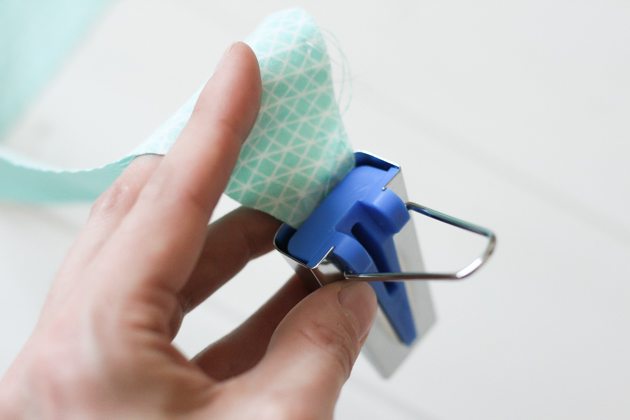
Push one end of the fabric through the wide end of the bias tape maker and pull it through to the narrow end. See the small, straight opening in the top of the bias tape maker? You can use a pin or seam ripper in that space to guide the fabric through to the opening. Adjust it until the fabric comes out folded equally on each side.

Begin pressing the folds in place with a hot iron as you gently pull back the bias tape maker. Continue pulling and pressing in small sections until you reach the end of the fabric strip.
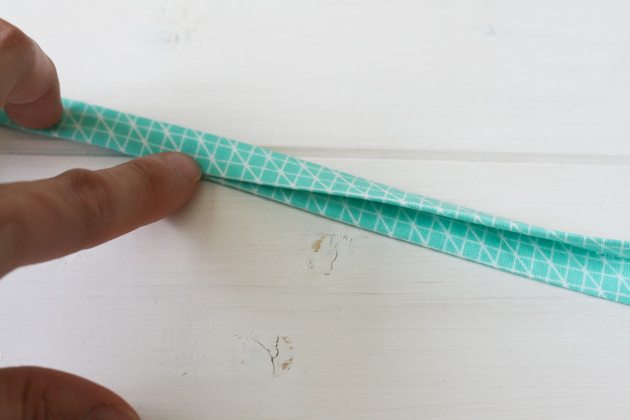
At this point, you have single fold bias tape. To make double fold bias tape, fold the binding in half one more time and press as you go.
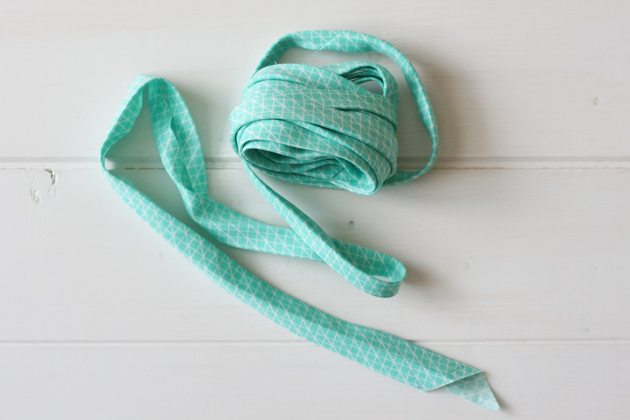
When you finish, you’ll have about 5 yards of ½” double fold bias binding to use on your potholders!
Though it’s a few minutes of extra work, making your own bias binding for the Hot Mitt House potholder will add endless binding options and allow you to create a potholder that matches your unique style. I hope you will give it a try!

Find Sara: Blog, Facebook, Twitter, Instagram, Pinterest
This post is part of the Betz White Sewing Collective series. Content is written by compensated contributors expressing their own views and opinions.