
Four long years ago I sold a collection of cashmere scarves in my Etsy shop that I made from super soft repurposed cashmere sweaters. They were fun to make and very popular! I’ve always intended to write up a tutorial so you can make one of your very own. Recently my dear friend Jan posted her scarf on Instagram and it motivated me to create this easy how-to!
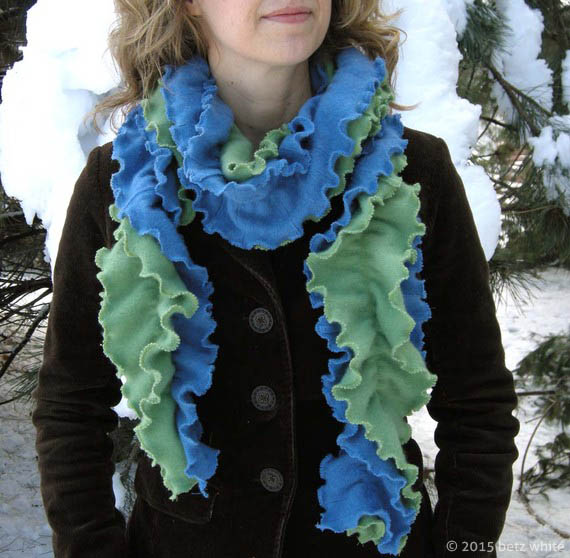
There are two versions of this scarf. A curly one, like the black/charcoal and blue/green scarves, above. They have a lettuce edge that make them super frilly.
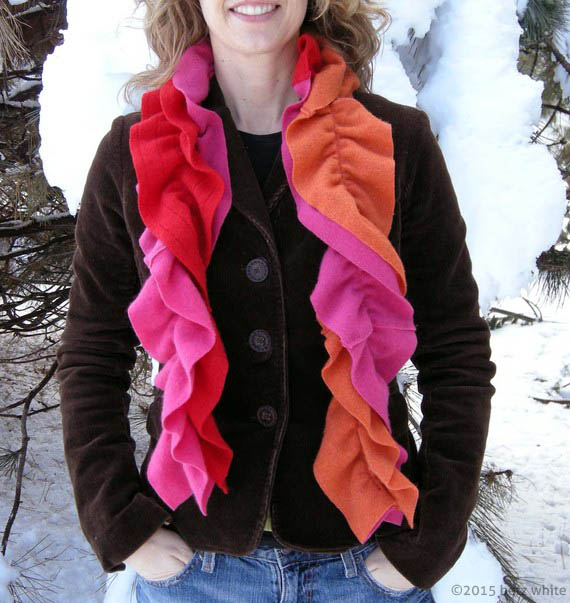
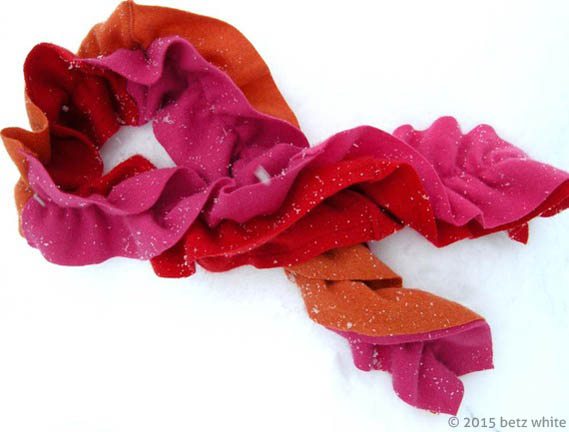
For a softer ruffle effect, you can leave off the lettuce edging, as shown in the pink/orange, above. The double ruffle design gives you two cozy layers to wrap up in with for maximum fluff.
Here’s what you’ll need to make yours!
2 or more cashmere sweaters in complimentary colors. Sweaters should be Women’s size Medium or larger, pullover style (not cardigan) in a flat knit (not cabled or textured).
2 yards of 1/4” wide elastic
Thread
Sewing machine with zig-zag stitch
Fabric Shears
Straight pins
Rotary cutter, mat and ruler
Please read the full tutorial before you get started!
1) Machine wash the sweaters on hot with detergent and dry in the dryer on low. This will slightly shrink and fluff the sweaters but they will not really felt like a wool sweater.
2) Disassemble the sweater by carefully cutting off the sleeves at the armhole seams. Cut the sleeves open by cutting along the underarm seam. Cut the shoulder seams open by cutting from the armhole to the neckline. For the body of the sweater, cut along ONE of the side seams to open the body up flat. Trim off the bottom edge of the sweater, ribbing or hem. (you can save these in your stash for another project)
3) Working horizontally across the body of the sweater, cut 5” strips using a rotary cutter, ruler and cutting mat. Make each strip as long as possible.
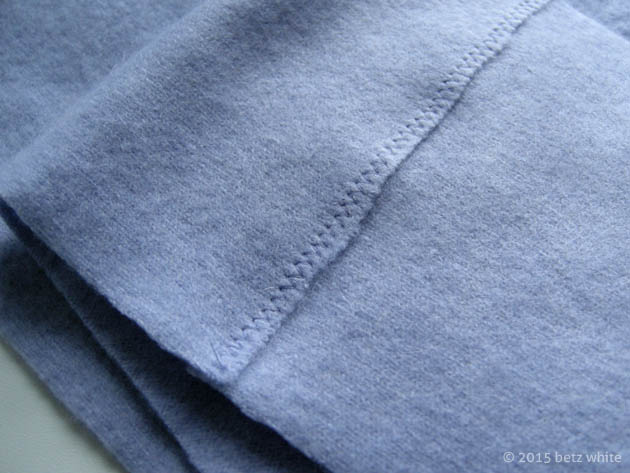
4) Sew the 5” wide strips together end to end. You’ll do this by creating lapped seams, that is, overlapping ¼” of one strip end over ¼” of another strip end. Pin over lapped ends together then seam with a wide zigzag stitch (above). If you own a walking foot, this would be a good time to use it, but it’s not essential. Steam press the seam if it gets wobbly. The total length of the assembled strips should equal approximately 80-90”.
Note: If you need more length, you may cut 2 more strips using the sleeves. However, the stretch will be different (cutting on grain vs. cutting cross grain) so bear in mind that the fabric will react differently when ruffled. (See the photo in Step 9 for details)
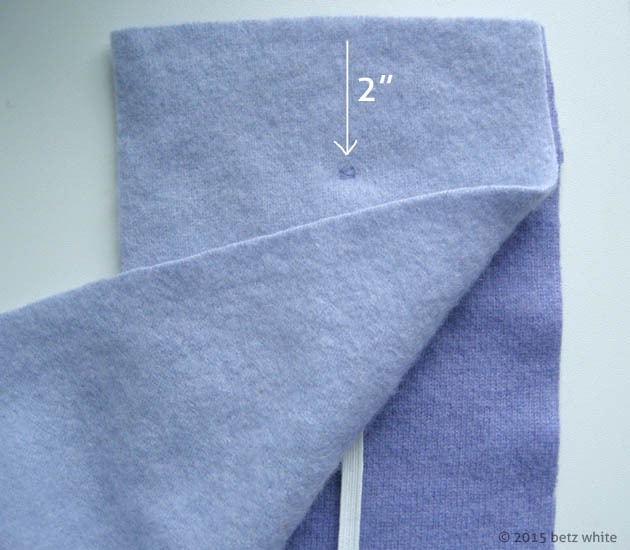
5) Repeat Steps 2-4 working with the second sweater. Layer one fully assembled strip on top of the other fully assembled strip, wrong sides together. Take one end of the ¼” elastic, and sandwich it between the strip layers, about 2” from the ends. Secure the elastic end with a pin.
Read through the next few steps to familiarize yourself with the technique before you start sewing. I also recommend practicing on some scraps before continuing.
6) Set the sewing machine on a wide zig-zag (4.5-5) and a stitch length of 3. Tack the end of the elastic by zigzagging through the layered strip ends (above). After you’ve tacked the end, leave the needle in the down position.

7) To create gathers, you will be stretching about 6” of the elastic at a time while zigzag stitching through the layered strips. Beginning with the needle down in the work, grip the elastic in one hand about 6” away from the end under the foot, and stretch it towards you, keeping it centered between the layers. DO NOT stretch the fabric at any time, only the elastic. With your right hand, firmly hold the stretched elastic between the layers. With your left hand, hold the work behind the presser foot to guide as you sew. Zigzag stitch down the center of the strips, through both layers and the elastic sandwiched in the middle.
8) Repeat step 7, stretching the elastic, centering it, and zigzagging in 6” segments, stopping about 2” away from the end of the strips. Cut off the excess elastic and tack the end through all layers by zigzagging a few stitches forward and back to secure. If the strips are uneven at the end, trim the longer one to match the length of the shorter one.
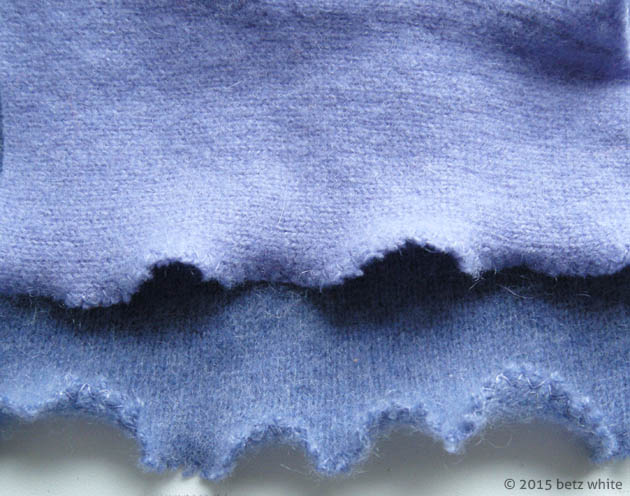
9) To create the ruffly lettuce edges on your scarf, set your machine’s zigzag stitch to a width of 3 and a stitch length of 2. This is another technique that is best practiced on some scraps first! The top swatch in photo above shows the lettuce edging with the grain for example, if you cut your strips vertically from a sleeve. The bottom swatch has lettuce edging across the grain, if you cut your strips horizontally across the sweater. Both edges ruffle but the bottom one is more dramatic.
Put one edge of one layer of the scarf under the presser foot. Backstitch, leaving the needle down in the work. Hold the work with your left hand behind the foot while gently stretching the scarf edge with your right hand. Begin zigzag stitching along the very edge of the scarf. Stretching the edge while sewing will cause it to ruffle as you sew.
10) Continue to stretch, stitch and ruffle the edge for the full length of the scarf, across the short end, and back up the other side and end. Repeat for the second layer of the scarf until all edges have been ruffled.
If you decide to skip the lettuce edge and make the soft ruffle scarf, the strips can really be cut straight or cross grain, it doesn’t matter as much. However, it makes sense to get the most out of the sweaters!
You’ll also notice the difference in scarf length in my examples. The pink/orange scarf is about 51″ long and is great unknotted or tucked into a coat. The blue/green scarf was mega-long, about 70″! And the Black/charcoal is somewhere in between. The length is up to you and the amount of material you have to work with!
I find my cashmere sweaters at the thrift store, rummage sales and second-hand from friends and family with moth problems. This scarf construction can also be used with fleece or t-shirt jersey, if you’d prefer!
(P.S. All of the scarves shown in this post sold out years ago. I’m not currently selling any new scarves but I will let you know if that changes in the future!)
Thanks so much for sharing! I think I need to do some thrifting soon. I just stumbled over a pattern you had a few years ago for a tea cup pincushion that I did make and love it!