I hope you have all of your Stitch-along materials gathered and are ready to go. (If you missed Day 1 you catch up here). Now, let’s get started with Day 2 of the Entomologie Stitch-along!

For starters, trace your hoops with a pencil onto a large piece of felt (White for those with kits). This will serve as the backing for our hoops later, but let’s get it out of the way now so we’re sure to have enough before cutting out other elements for the bugs. Trace the outside of the hoops. You can cut them out now or wait until later, but you can use the leftover bits at the ends for some of your appliqué pieces.
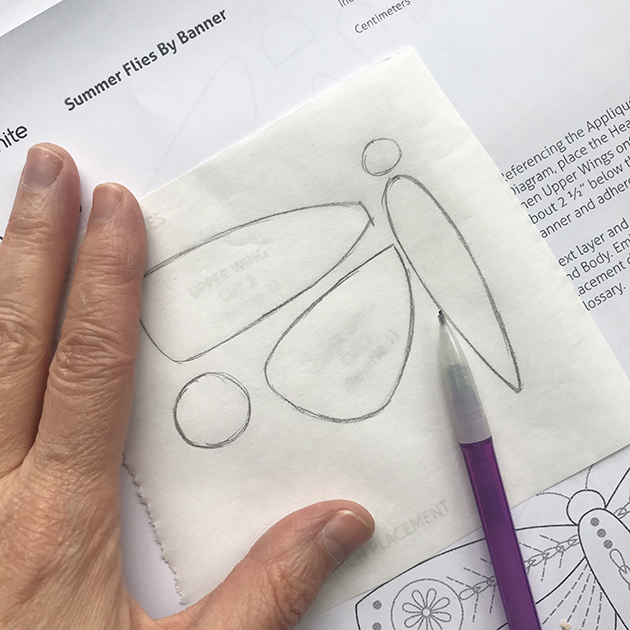
Next, take a piece of freezer paper and place it shiny side down onto on of the template print outs. I started with the dragonfly. Trace each part onto the matte side of the freezer paper. Even if the piece say you’ll need 2, you only need to trace it once. Cut out each tracing just outside (not on) the pencil line.
[image_options image_id=”17400″ align=”none” overlay=”file”] [/image_options]
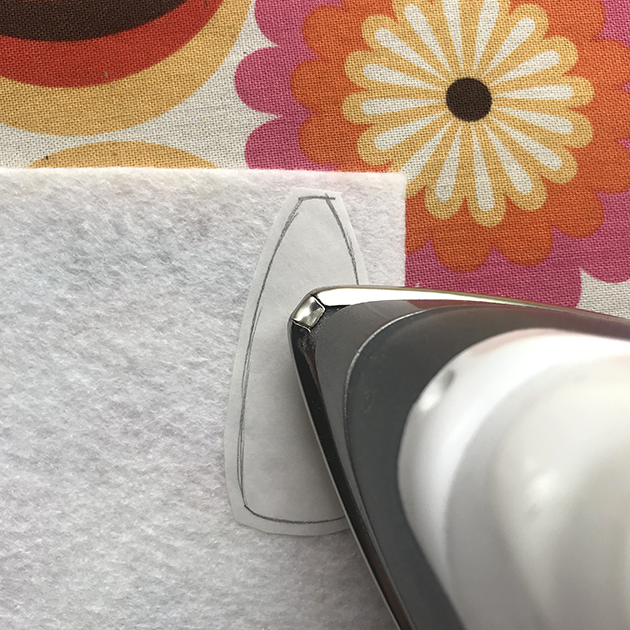
Place the shiny side of the template onto the color felt you’d like that piece to be and press with a warm iron. I’m making the upper wing of the Dragonfly white. This will lightly fuse the template to the felt.
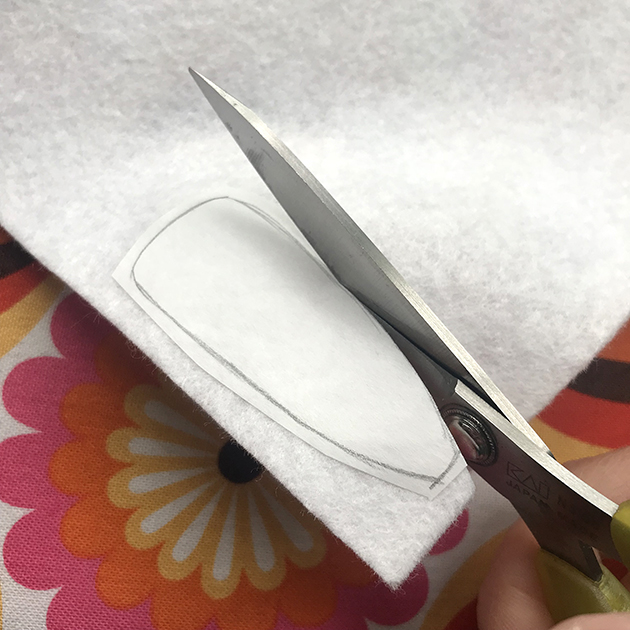
Next, Cut out the felt on the pencil line.
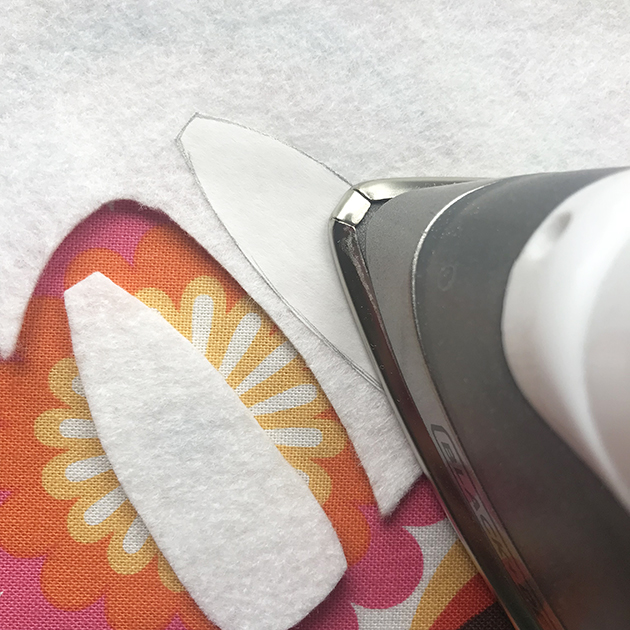
The cool thing about freezer paper templates is that they’re reusable! Simply peel it off of the first piece and press it again to another area of felt. Freezer paper templates can be reused several times and they don’t leave any residue on the felt.
Continue pressing and cutting out each template until you have everything you need for your bug. You’ll notice that the wing pieces says to cut one in reverse. Because felt is two sided, you don’t need to flip the template (well you can’t if you’re using freezer paper!) but you can flip the cut felt piece over.
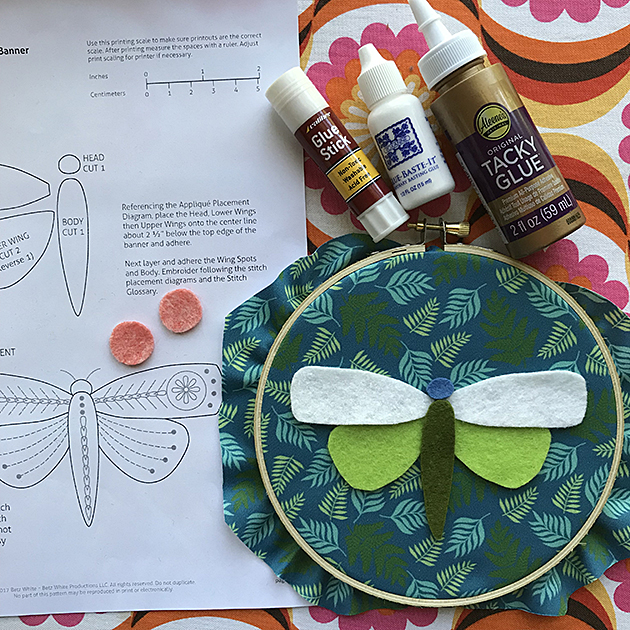
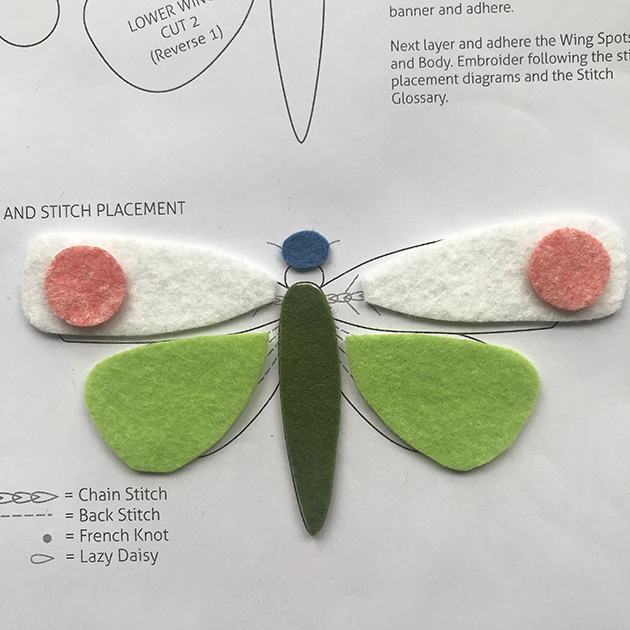
Next you’ll place the background fabric into a hoop. Separate the hoops, place your fabric on top of the inner hoop then slide the outer hoop on top. Tighten the screw at the top to secure and keep the fabric taut. Lay out your cut appliqué pieces in the center to get an idea of how they’ll fit together. You can see that the upper wings overlap the lower wings and the body is layered on top last.
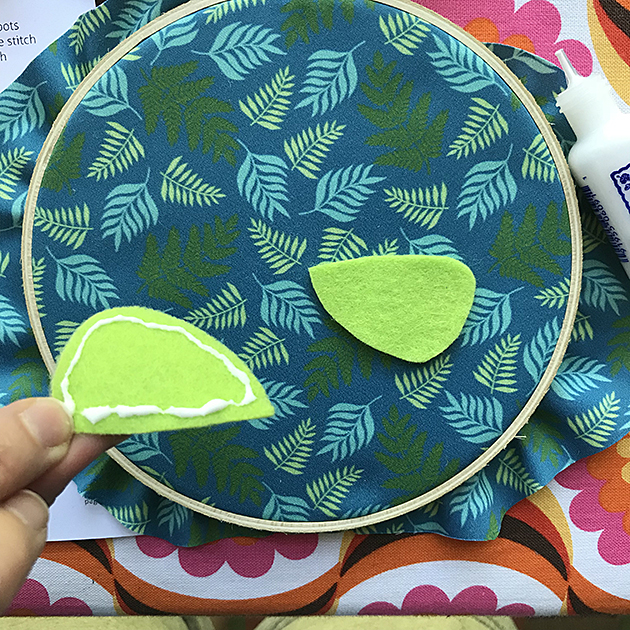
Using your glue of choice (I love Aileens Tacky glue but I’m trying Roxanne’s this time!), lightly apply glue to the back of the pieces on the bottom layer first, the lower wings. I use just a tiny bit around the edges, keeping it away from the areas where there will be a lot of stitching.
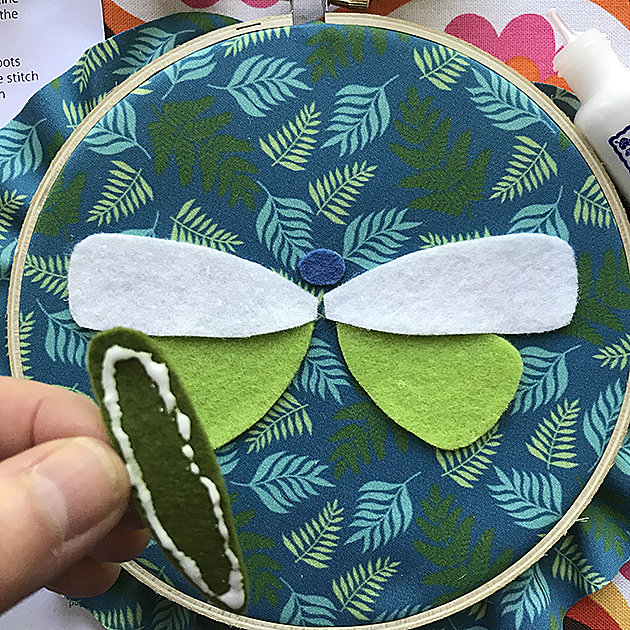
Keeping an eye on the placement instructions, lightly glue the edges of the next layer (upper wings), then the head and the body.
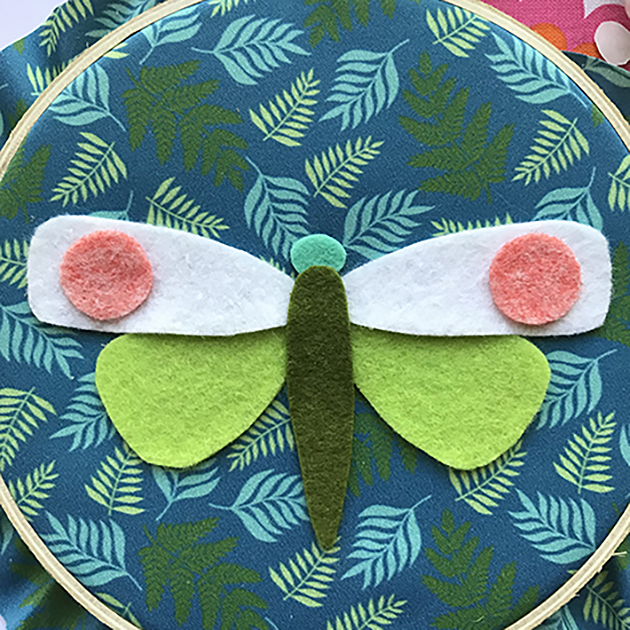
I decided at the last minute to change the head color and cut a new one out of aqua felt. I think it shows better on my background fabric. Then I used more glue coverage on the head because I don’t plan on stitching it, it will only be held by glue. Lastly I added the wing spots using the tiniest bit of glue because they will have a lot of stitching holding them in place.
So get cutting and play around with colors and backgrounds! There is no one way to make yours, you have complete artistic license to vary from what I’ve shown here. Go ahead and cut out your dragonfly, one of the other bugs or cut out all of them at once it you’d like! See you back here on Friday for Day 3.
Thanks for these instructions! I hope to get to cutting and pasting this weekend!