
Why do I look so happy? Because today I bring you lesson #4 in the Reversible Bucket Hat sew-along! You can catch up with lesson #1, #2, and #3 if you’re just joining us! It’s time to attach the outer hat to the hat lining and finish this project up!

Match Outer Hat to Lining
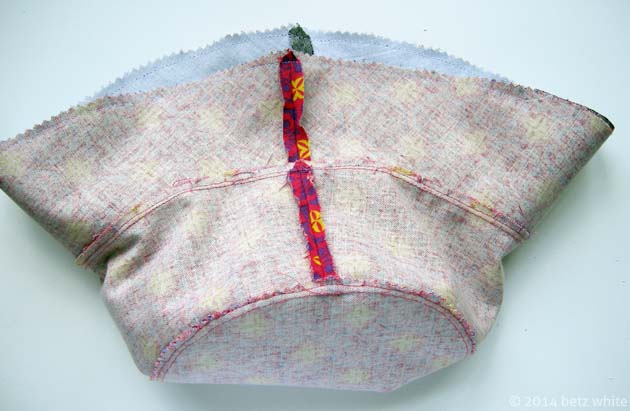
Place the lining (right side out) down inside the outer hat (wrong side out). The right sides should be facing each other. Align the side seams and pin. Continue to pin the lining to the outer hat around the perimeter of the Brim, leaving about 3″ of the perimeter open for turning. In the photo above, you can see where I’ve flanked the opening with a pair of pins on each side. This is where I start and stop sewing.
Sew, turn and press
Sew around the perimeter (except for the 3″ gap) with a 1/4″ seam allowance. Trim your intersecting seam allowances and pink your brim seam allowance or clip. Next turn the hat right side out through the gap. Press the seam, working out the seam allowances with your fingers.
Press the seam allowances at the gap in towards the wrong side. Press, then secure with pins.

Topstitch and close
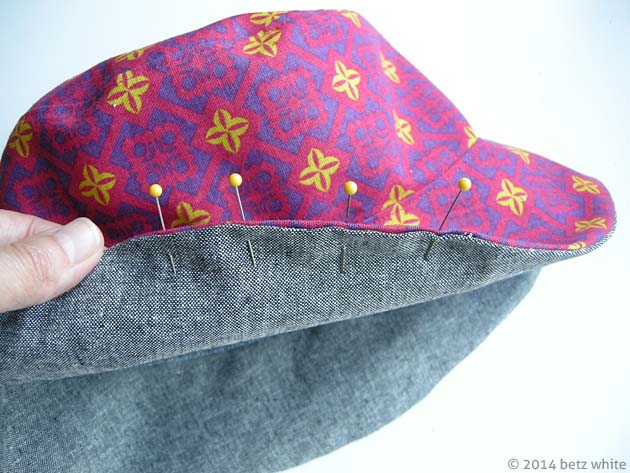
Topstitch the perimeter of the brim, 1/8″ from the edge, closing the gap as you come to it. I usually set my machine at a stitch length of 3 for topstitching. I match my top thread to the outer hat and the bobbin thread to the lining.

And we’re done! Here’s the hat reversed with the lining view in action! (due to mosquito attack, I couldn’t convince my Jr. photographer to reshoot this blurry shot for me!)
I hope you’ve followed along and are making your own Reversible Bucket Hat! Check out the hats people have posted in the Betz White Sewing Pattern Forum on Facebook. Post photos of your hat there or on Instagram with the tag #sewlongsummer for a chance to win 3 of my patterns! Enter through August 22, winner announced August 25th.
Next post I’ll talk about ideas for alternative fabrics!